Friday 29 June 2018

Just for you - SNS June reveal


 Hello my dear crafty friends and welcome to my last June Sparkle N' Sprinkle reveal post. Irit is here and
this time I used the same Cosmos Blooms set again, but in a totally different way.

Product list:
Stencils Art Anthology
 Zig Water colors

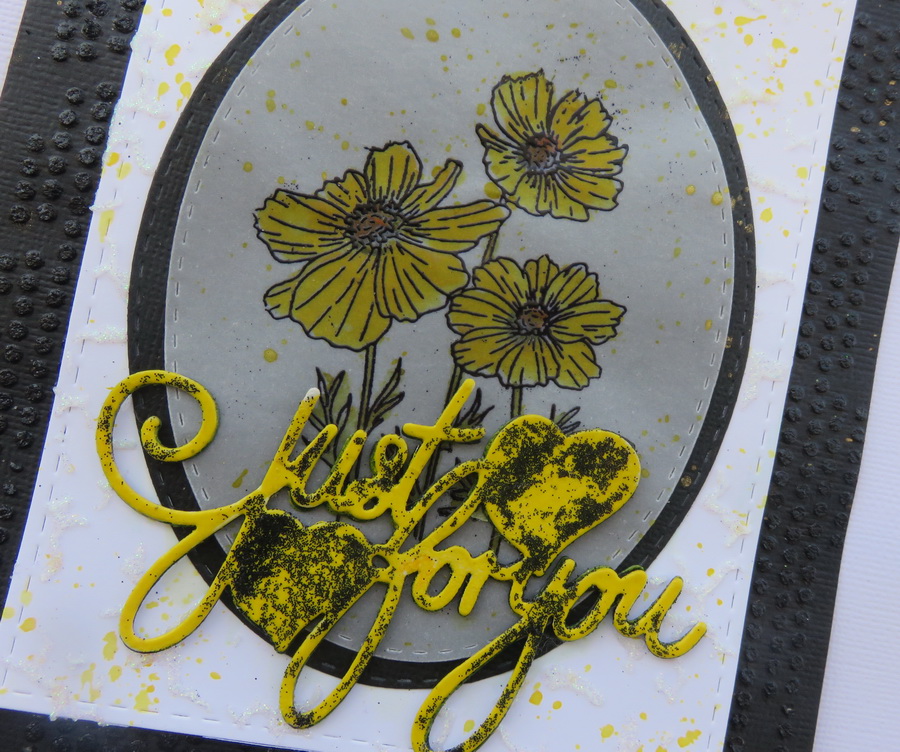
I stamped the flowers over vellum and color them with Zig water color markers.
I made two layers of textured backgrounds using Tonic Studios Glitter pastes and make a chipboard like die cut Tonic sentiment.
You can see the whole process in my step by step tutorial HERE in my own blog!

Be sure to leave a comment both here on this SNS blog post and then head over to my own blog  and leave a comment there as well for your chance to win a $20 gift card to SNS! One lucky winner will be chosen from one of the Designers' posts on the last day of each month. A comment must be left on both the SNS Blog and the Designer's post in order to qualify. The winner will be announced on the 3rd of the following month, both on the SNS Blog and on the SNS Facebook page.


Step by step tutorial:
1. Die cut the oval frame and put the oval part as a mask over the rectangle die cut card front as shown. Cover it with stencil and add Tonic Moon stone glitter paste over the stencil. 
  

2. Die cut a smaller oval from vellum paper and stamp the blooms with VersaMark and heat emboss with black detail embossing powder.


3. Color the stamped blooms with Zig watercolor markers and arrange over the card as shown.


4. Make large black cardstock matting and cover the edges with the same stencil and Tonic Black Diamond glitter paste around. The blue die  cut piece is just a mask that keeps the white card space clean.


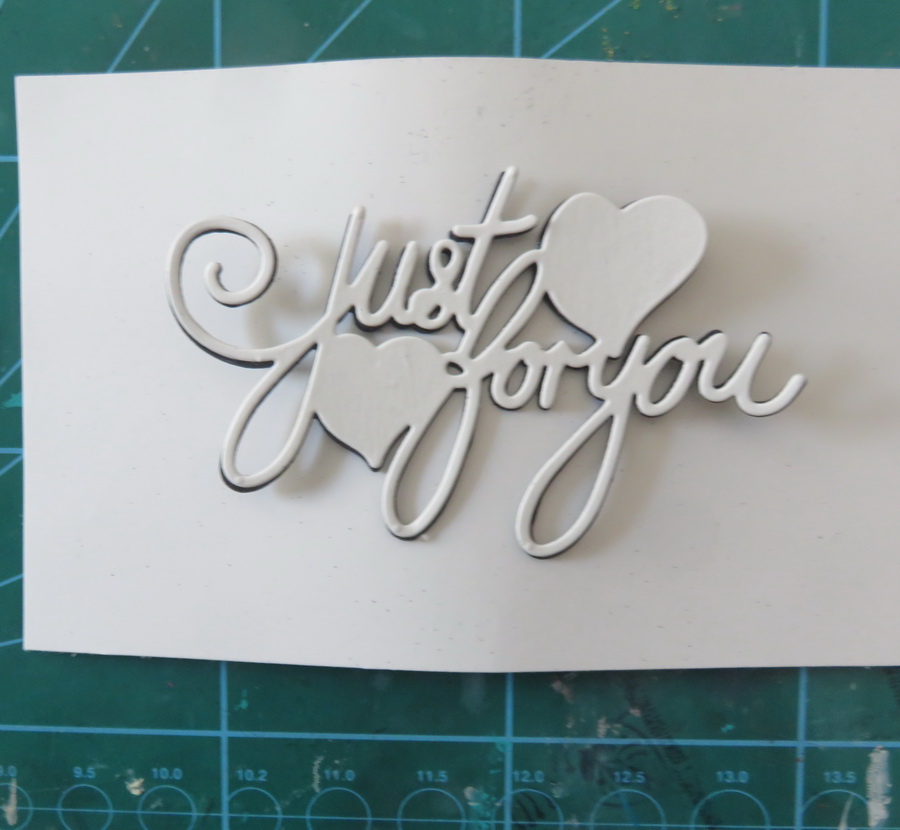
5. Die cut the sentiment several times and glue it one over another to make a chipboard like shape.White color should be on the top.All other colors are not so important as we don't see them.


.Cover the sentiment with VersaMark ink and heat emboss with Daffodil embossing powder


.Add SNS Brushable glue over the yellow sentiment and sprinkle a bit of Black Ice glitter


 Glue the sentiment over the card and mist a bit with yellow mist as shown.


Thursday 28 June 2018

Baby cubes gift box video tutorial with BoBunny


 Hello my dear crafty friends and welcome to my new BoBunny video tutorial post.
This time I made this lovely Baby Girl cubes box using the new, just released and most gorgeous Little Wonders BoBunny collection.
I made the cube sketch by myself and as you can see on my video tutorial it's an easy sketch and all you need  are two cardstock pieces cut to 12*8'' size and then it's just a matter of scoring them, folding and arranging them to this 3d cubes box.
In my video I used American Crafts blue cardstock just to show the sketch, scoring and folding as the sample. The actual project was made with American Crafts light pink cardstocks.
This is how it looks from the side:


Some more photos of the finished project for you to see:


 The flower cluster was a piece that I made with craft shop flowers for another project and never used.
The colors were just perfect for this project and the option of folding this metal trinket into half was the perfect way to glue it over the cube.


You can watch my video HERE- and I hope it's pretty good as I am not a huge video filming expert after all.

  Products used:
BoBunny Little Wonders collection 12*12'' cardstock:Alexander,Elliot, Evan, Sage, Sophia, Willow
Little Wonders Combo Stickers
Little Wonders Layered chipboards
Little Wonders Noteworthy die cuts
BoBunny Trellis Square die
BoBunny Double Dot Think Pink jewels
American Crafts Mixed Media inks by Vicki Boutin
American Crafts pink cardstock
American Crafts Sticky Thumbs adhesive runner
American Crafts Sticky Thumbs adhesive foam dots

Other products:
Spellbinders square and scalloped square dies
Flowers and metal trinket- craft shop

Thanks for being here with me today and see you next week with more BoBunny inspiration!

Tuesday 26 June 2018

Live your dreams card with Magenta


Hello my dear crafty friends and welcome to my second Magenta June post.
Irit is here today and I am going to share a card made over the leftover cardstock front and the leftover acrylic paints as my background and card front.


 The die cut circle cardstock was the left over piece from another project. I had a lot of acrylic paint drops on my craft mat. With some water added I swiped the cardstock over these leftovers  and Bingo! What a nice and totally unique background !
The inside circle stamping was done in two layers.
I first stamped Magenta new and gorgeous Galaxy Cluster image over the back white cardstock. Then I stamped the Lone Daisy flower over transparency and added it inside the circle. What a nice way to layer stamped images one over another!
Then I stamped the same flower image in the same gold heat embossed way over the painted card front.


 The sentiment was stamped over white cardstock with VersaMark and heat embossed with gold embossing powder.


 Some white enamel drops were added for more interest and to coordinate with white cardstock with the sentiment and white basic card.


*****


22.047.H


18.090


09.225


Thanks for being here with me today and see you next month with more Magenta inspiration!
Irit Shalom- DT Magenta


Saturday 23 June 2018

Celebrate with CAS-ual Fridays challenge

Welcome friends. We are so glad you are joining us for the revamped CAS-ual Fridays challenge. There are no genre restrictions for this challenge. Link up your clean and simple designs or layer it on -- the choice is yours.  Make sure to link back to this blog post and include the graphic below in your post for consideration of being chosen a winner.


Image may contain: fireworks


This card was a pure fun to make.
First I splashed  over the black cardstock with acrylics. Then I added a dotted stencil with VersaMark ink and heat embossed with gold powder.
Then the sentiment was stamped and heat embossed with the same powder and finally the die cuts were
 " goldened" to the same color with heat embossing. It's really 10 minutes card and you can change the colors of acrylics or of embossing powder to make a very similar, but still different card.
 Products used:
Celebrate stamp set
Jumping Jacks Fri-Dies

What are your playing for? 10 winning entries will be highlighted on this blog each Thursday before a new challenge is set to go live the next day.  In addition, Michele has generously offered up a $25 gift certificate to the overall winner atCAS-ual Fridays Stamps. And if that weren't enough, if the chosen winner has used CAS-ual Fridays stamps and/or dies as the main focus in the card, that gift certificate will increase to $50.


Now let's see what our designers came up with for this challenge. Please click on their name above the photo to be taken directly to their blog to learn more about the project and to give them some love.

Also, you can find direct links to the CAS-ual Fridays stamps and Fri-dies that the designers used which are linked underneath their names. Remember, you don't have to use CAS-ual Fridays Stamps and dies to play along but if you do and you are the winner, your gift certificate increases to $50.

Friday 22 June 2018

Kids large cards with Little Wonders BoBunny collection


 Hello my dear crafty friends!

Irit is here today and I am going to start my own reveal of two new and most gorgeous BoBunny collection.
For today I am going to share two pretty large cards made with one of the new collections- Little Wonders.

Both my cards are 7*5 3/4'' size.
The Baby Girl card was made as a gate card and the Baby Boy card is a regular one shaped card.
I also added inside embellishments in each card as with this size you can add as much writing as you wish or to use both cards as a gift card holders.

This is my Baby Girl gate shaped card here.
The heart die BoBunny die cut was used as a base for double sentiment that was made with cardstock and chipboard layered sentiment all together.
The jewels were added as my only embellishments.
But then I decided to add glitter paste hearts over the white spaces using BoBunny stencil and glitter paste.
I am sorry that it's not much seen, so try to enlarge the photo to see the glitter hearts on the corners.


 And this is how it looks  when opened:
Again I used some die cut pieces and layered the Noteworthy die cut with some Combo stickers around.


And here is my Baby Boy card:
I made it as a shaker card using rectangle die cut frame and simple office transparency to cover the frame.
The inside was arranged with cardstock and die cut elements covered with a mix of sequins from craft store.
The sentiment was made over the transparency with this collection Thickers  on the top and doe cut and layered chipboard on the lower corner.


 And this is how it looks when opened:
A few stickers/die cut shapes were added and then I made this cute die cut bear using BoBunny die and some glitter in the spaces.


BoBunny product list:

Little Wonders cardstock collection 12*12'' : Alexander, Evan,Elliot, Sage, Sophia, Olivia, Willow
Little Wonders Combo Stickers
Little Wonders Noteworthy die cuts
Little Wonders Layered Chipboard
Little Wonders Thickers
Darling Doily Die
Bear Necessities Dies
Ornate Heart Die
Banner Tag Dies
Mandala Die
Congratulations Card Dies
Glitter Paste Sugar
Lots of Love stickable stencil
Double Dot Think Pink Jewels
Double Dot Think Pink Flourish Jewels

Other products:
Office transparency
Sequins mix


I really hope that you like this gorgeous and not so " baby" collection and you also like my huge cards made with this collection!
Thanks for being here with me and see you in a week again with another project made with one of our new releases.

Wednesday 20 June 2018

Enjoy the little things- SNS June reveal


 Hello my dear crafty friends!
Irit is here and this is my second card made for our new and most gorgeous Sparkle N' Sprinkle June reveal.

Product list:
Distress inks Ranger
Stencil Scrapmatts
Gel medium

 I made this card with a use of masking fluid from Tonic Studios and this was my very frist time to use it.
And guess what? It works perfectly!
You can see the full tutorial in my own blog HERE!

Be sure to leave a comment both here on this SNS blog post and then head over to my own blog  and leave a comment there as well for your chance to win a $20 gift card to SNS! One lucky winner will be chosen from one of the Designers' posts on the last day of each month. A comment must be left on both the SNS Blog and the Designer's post in order to qualify. The winner will be announced on the 3rd of the following month, both on the SNS Blog and on the SNS Facebook page.

Some more finished card photos for you to see :


 Step by step tutorial:
1. Stamp My wild rose with VersaMark three times over white cardstock and heat emboss with Black detail embossing powder.


2. Cover the stamped roses with Tonic Studios masking fluid as shown and let it dry.


3. Add background color using Distress/Distress Oxide inks and water while masking fluid is still over the stamped images.


4. Peel off the dry masking fluid.


 5. Paint the flowers with distress inks as shown. Add gel medium over the shite spaces using stencil.


6.Sprinkle Crystal Ice glitter over wet gel medium and let it dry.


7. Stamp the sentiment and glue it over black cardstock matting.

Thursday 14 June 2018

Thanks card


This card was made with BoBunny products and was already print published a long time ago.
The main point in this card were laces that were added inside the chipboard frame or glued over double sided glue tape and hand cut to adhere to the card.


Popular Posts