Wednesday 19 June 2019

Happy Birthday Mixed Media card

Hello my dear crafty friends! Irit is here today and I want to  welcome to my new June post made for CAS- ual Fridays blog with their most delicious products.
I am going to share a Mixed Media card made in clean and simple style., but yet this card is full of color and brightness even if it is pretty much monochromatic.


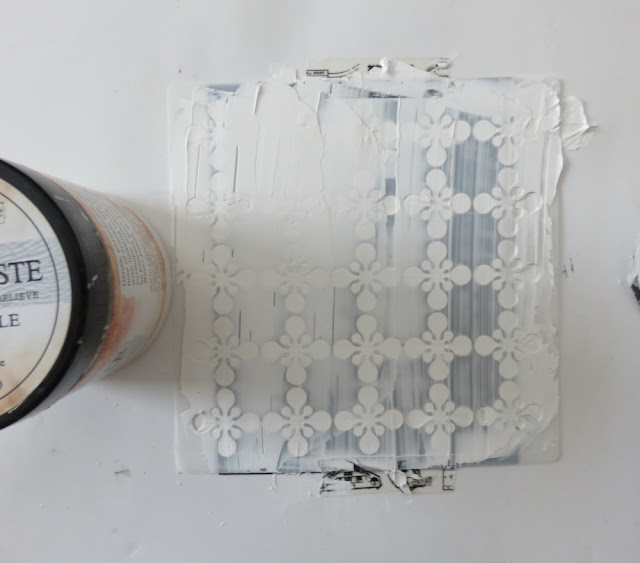
  The background was made with one of CAS- ual Fridays' stencils and heavy gel medium.
Gel medium is a perfect medium to work with stencils, but the drying time is not so short. The best way is to add gel medium late evening and to let it dry overnight.
Then the mix of three mists in pink and purple were added and to shorten the drying time I used my most loved old heat gun.

 The main title spot was done over oval patterned cardstock with lovely CAS- ual Fridays stamped sentiment using black pigmented ink and clear embossing powder.


 Then I die cut a few Fri- die splashes from black cardstock and added them with two layers over the card front.

  The only other embellishments that were added are some clear  gold  liquid dots.
Yes, third time drying time...
But look how fancy this simple card looks after all.

Here are the CAS- ual Fridays products used to make this card:

Modern Petals


I hope that you like my new Mixed Media card and would try something similar with our gorgeous CAS- ual Fridays products.
You can also use my own discount and to get this 15% discount with my own code.


Tuesday 28 May 2019

CAS- ual Fridays May post

Hello my dear crafty friends! Irit is here today and after a month in hiatus I want to  welcome to my new May post made for CAS- ual Fridays blog with their most delicious products.
I am going to share a Mixed Media card made in clean and simple style.
Can you believe that Mixed Media can be done in CAS style? Yes, it can.You use s lot of different mediums, but then the general car layout is still clean and simple, as you can see on this card.


I used one single CAS- ual Fridays stencil with crackle paste and two Fri- dies with the add- ons of a few mists and some enamel drops.
I also made a small and short tutorial for you to follow and to try this maybe odd card style of mine.
Here are the CAS- ual Fridays products used to make this card:


 And now let me show you some steps of doing this card:
1. Cover the black card front with Bold Trellis stencil and use Crackle paste over it.


2. This is how it looks without the stencil, but yet without any cracks.


3. Add three mist over the dry card front and let they dry.


4. Make the central matting part (I used a die to make the shape, but it can be just a rectangle). Mist the matting part with two of the mists and let it dry. Die cut the CAS- ual Fridays title from white cardstock.


5. Mist the die cut title with the light blue mist and let it dry.Die cut another title from light green cardstock.
Die cut one Noteworthy strip from the same light green cardstock.

6. Arrange the title as shown: one word with blue over green as the shadow and the second word green over blue as  the shadow.
Add the die cut strip under the matting piece.
Add a few blue enamel drops over the card.


Here is a close- up to the central part of my card:


I hope that you like my new Mixed Media card and would try something similar with our gorgeous CAS- ual Fridays products.
You can also use my own discount and to get this 15% discount with my own code.

See you next time with more CAS- ual Fridays inspiration!

Monday 1 April 2019

One stencil - two ways- with CAS- ual Fridays


Hello my dear crafty friends! Welcome to my new April post made for CAS- ual Fridays blog.
Irit is here today and this time I am going to show a card made with one single new and just released stencil that was used in two different ways as the background and then on the main heart shaped image.

I used this lovely Bold Trellis stencil with two different mediums and as you see it looks totally different.
The background is made with Gel medium over the stencil that was positioned over white cardstock
Then the dry image was covered with a mist of Distress inks and wiped with a baby wipe to leave the white images that are glossy.


 The inside heart was die cut from the stencilled black cardstock.
This time I used red glitter paste and the look is very glittery.


The sentiment was stamped over white cardstock and glued over the inked smaller heart.


This is the stencil used twice to make this card:


And the stamp set used :


I hope that you like my used of one single stencil and as you can see this is an easy way to make lovely card with minimum effort if you have our lovely CAS- ual Fridays products.
So here is my own discount for you to use in CAS- ual Fridays shop.
Go for it! And see you in a couple of weeks with a new card and a tutorial.


Saturday 30 March 2019

CAS- ual Fridays new release - Day 7- Tin Roof cover


Hello my dear crafty friends and welcome to DAY 7 and last of our new and most gorgeous CAS- ual Fridays new release.
This release is Fri- dies and new stencils only. But you would see a lot of our stamps on our new projects and can pick some together with the new release products.
We will show you some techniques made with new dies and stencils and then you can comment and to have a great chance to win some goodies.
More info about the giveaway is in the main company blog!
Today we are going to show you our new cover Tin Roof die.
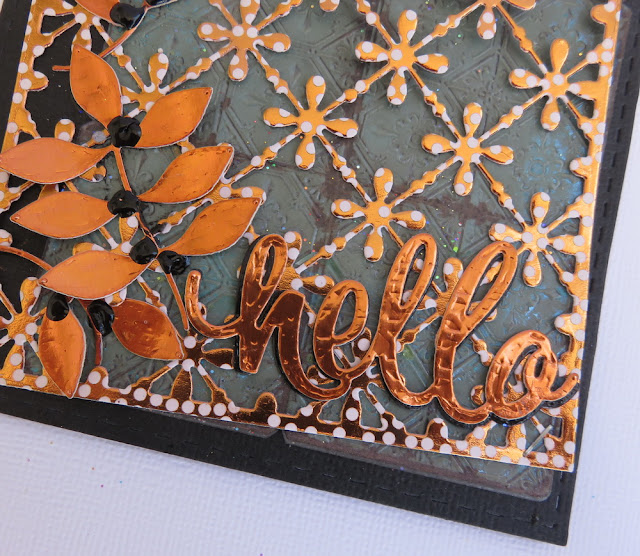
I used just one single die to make my vintage card, but the copper cardstock was just perfect for the card cover and then I added one single die cut word made with a new Sweet Friend Fri- die word Hello and added some copper die cut leaves using Garden Fri- dies.

This is the new cover Fri-die used to make this card:

And the word Hello from this new Fri- dies set:


And the oldie, but the best Garden Fri- dies set:

Here are some close- ups of this fancy card for you to see:


I hope that you like my vintage  die cuts only card and would love to buy  the best ever products here in our shop!
You are most invited to use my own discount code of 15% on our new release!
That's it! Out long week new release is over and you are welcome to see our regular posts in the company blog and our blogs in a couple of days.
Thanks for being here with us and we hope that you loved our CAS- ual Fridays new release as much as we loved it.


Friday 29 March 2019

CAS- ual Fridays new release - Day 6- Just Breathe


Hello my dear crafty friends and welcome to DAY6 of our new and most gorgeous CAS- ual Fridays new release.
This release is Fri- dies and new stencils only. But you would see a lot of our stamps on our new projects and can pick some together with the new release products.
We will show you some techniques made with new dies and stencils and then you can comment and to have a great chance to win some goodies.
More info about the giveaway is in the main company blog!
Today we are going to show you our great Just Breathe  Fri- dies.
I used just this words die over the background made with one of our new and just released stencils called Curtis.

 The background was made over white cardstock using glitter black paste over Curtis stencil and when dry t is was misted with a mix of blue and teal mists.
This is the die set used to make this card:

And this is the stencil used for the background:

And now for a couple of close- ups of this card:


 The title was die cut several times and glued one over another , but with some kind of a " shade" and not exactly . Then I covered the upper layer with a thin layer of glossy accents.


I hope that you like my Mixed Media card card  and would love to buy  the best ever products here in our shop!
You are most invited to use my own discount code of 15% on our new release!
See you tomorrow on DAY 7 and last for this release!

Thursday 28 March 2019

CAS- ual Fridays new release - Day 5-Noteworthy Fri- dies


Hello my dear crafty friends and welcome to DAY 5 of our new and most gorgeous CAS- ual Fridays new release.
This release is Fri- dies and new stencils only. But you would see a lot of our stamps on our new projects and can pick some together with the new release products.
We will show you some techniques made with new dies and stencils and then you can comment and to have a great chance to win some goodies.
More info about the giveaway is in the main company blog!
Today we are going to show you our set of three Noteworty Fri- dies.
I used just one single die to make my vintage card, but I used it three times to make my notebook pages.

This is the dies set released today:


And this is Sands of time 2 stamp set used as the main image:

And another angle of this card:


I die cut three pages and layered them over the card base.
The sand clock was stamped and cut with electonic device; then I stamped the inside with gold heat embossing ,inked the image and covered it all with glue accents. The sentiment was stamped with the same gold embossing powder.
I hope that you like my vintage card card  and would love to buy  the best ever products here in our shop!
You are most invited to use my own discount code of 15% on our new release!
See you tomorrow on DAY 6!


Wednesday 27 March 2019

CAS- ual Fridays new release - Day 4-Trellis Cover Fri-Die

Hello my dear crafty friends and welcome to DAY 4 of our new and most gorgeous CAS- ual Fridays new release.
This release is Fri- dies and new stencils only. But you would see a lot of our stamps on our new projects and can pick some together with the new release products.
We will show you some techniques made with new dies and stencils and then you can comment and to have a great chance to win some goodies.
More info about the giveaway is in the main company blog!
Today I am going to share the first of the two just released card cover dies- Trellis Cover.


This is the new released die- Be a Unicorn:


And the stamp set used for this card:


And now for some close- ups of this card:


The Trellis cover was die cut from glittery dark red cardstock and glued over the sticker paper. Then the shiny glitter was added over the free space and as you can see it's the WOW! factor on the back of my card.
Then the unicorn was stamped and cut with electronic device and covered all over with the same glitter.

The sentiment was stamped with permanent black ink and I added some glitter around it too.

I hope that you like my shining card card  and would love to buy  the best ever products here in our shop!
You are most invited to use my own discount code of 15% on our new release!
See you tomorrow on DAY 5!

Popular Posts