Wednesday 31 October 2018

CAS- ual Fridays November release- Merry Christmas Fri-Dies & Happy Hanukkah Fri-Dies

Hello my dear crafty friends!
Welcome to Day 4 of our new CAS- ual Fridays Holiday release.
 Today's release are two matching Holiday dies: one is for Christmas and the second is for Hanukkah.
So I made a " twin" cards set- same arrangement, but totally different look. 
The mediums used are different and so are the card colors made in totally traditional  Holidays colors.


 Merry Christmas Fri- die
 Happy Hanukkah Fri- die

Here are some close- ups to the twin cards:
On the Christmas card the circles were made with gold glitter paste and then the card was misted with a mix of green mists.
The sentiment was die cut once and glued in the Mixed Media style with Glossy Accents that are seen, but everything can be done on Mixed Media card.


On the Hanukkah card the circles were made with white texture paste over the same stencil and then heat embossed with silver embossing powder.
The background was made with Distress Oxide inks and water.
The die cut sentiment was die cut from silver glitter cardstock.


 So as you can see: two cards- same look, different mediums.
Both card are easy to make and can be done as the mass production.

So come back during the next 2 days and if you want to buy some of our new goodies, here is the discount code for you to use:


See you tomorrow with more CAS- ual Fridays inspiration from the new release!


Tuesday 30 October 2018

CAS- ual Fridays November release-Mistletoe Fri-Dies


Hello my dear crafty friends!
Welcome to Day 3 of our new CAS- ual Fridays Holiday release.
Today I am going to share a book shaped card made with the new Mistletoe Fri- die and the older matching stamp set.
The size of the main image and the sentiments were perfect for this  book shaped card and I made all pages using new BoBunny Holiday paper collection.

 The sentiment was stamped directly over the patterned cardstock.
The main image was stamped, die cut, colored and embellished with  Nuvo drops over the ribbon and the berries and then glued over the book page on the left.


Here are the products used to make this fancy Christmas card:


Mistletoe Fri- dies

So come back during the next 3 days and if you want to buy some of our new goodies, here is the discount code for you to use:


See you tomorrow with more CAS- ual Fridays inspiration from the new release!

Monday 29 October 2018

CAS- ual Fridays November release-Dashing stamps & Snow Fri-Dies


Hello my dear crafty friends!
Welcome to Day 2 of our new CAS- ual Fridays Holiday release.
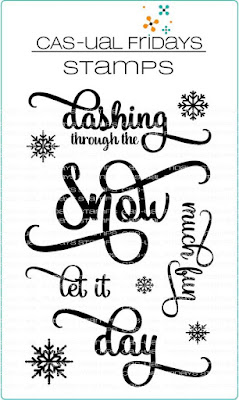
 Today we are going to show you the new stamp and die set called Dashing Stamps and Snow Fri- dies.
As you know I usually make pretty flat Mixed Media cards, but with this set and die I decided to use the new Holiday paper collection from BoBunny and to make colorful and full of elements card for the change.
And I really love the final result.


As the background cardstock was a busy one I just added some stamped snowflakes from the new set over the " white space" on the top using pigmented blue ink.
Then the die was cut several times. The bottom was die cut from  hot pink collection cardstock for
 the " shade" and all over layers were glued over it.
The top layer was covered with the same blue ink and heat embossed with clear embossing powder.


 Snow Fri- die


Dashing stamps

So come back during the next 4 days and if you want to buy some of our new goodies, here is the discount code for you to use:


See you tomorrow with more CAS- ual Fridays inspiration from the new release!

Sunday 28 October 2018

CAS- ual Fridays November release-Big Hope Fri-Die


 Hello my dear crafty friends!
Welcome to Day 1 of our new CAS- ual Fridays Holiday release.
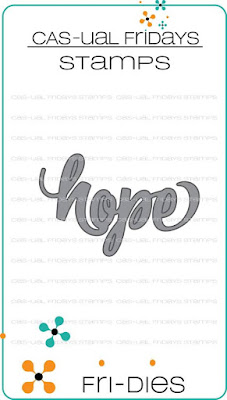
Today I am going to share a card made with one new single word die, but the word I used is maybe the most powerful one. Hope. This is the thing we all need and cherish and if  there is a hope around things are going better.
 So Hope for the best and use this gorgeous new CAS- ual Fridays die!


The background of this card was made with emboss- resist technique.
First the four words from Powerful Words  stamp set were stamped with VersaMark ink and heat embossed with glitter gold embossing powder.
Then some dots were added with blue glitter paste over a stencil.
The dry surface was misted  with a mix of blue mists.


 The word Hope was die cut 6 times. The bottom layer is white for the contrast and then all layers were glued one over another. The upper layer was heat embossed with the same embossing powder.


This is the new die released today!


 Big Hope Fri- die

 And this is the older stamp set used for the background:


So come back during the next 5 days and if you want to buy some of our new goodies, here is the discount code for you to use:
See you tomorrow with more CAS- ual Fridays inspiration from the new release!

Thursday 18 October 2018

Happy Hanukkah card with CAS-ual Fridays

Hello my dear crafty friends!
Irit is here today and  I am going to share my first Hanukkah card made this year.
 I know that both Christmas and Hanukkah are far far away, but we'd better try to make our cards in advance as if you try to make them just before the Holidays you never  make them after all...
And when you work with CAS- ual Fridays stamps and die you have the most perfect selection of Hanukkah and Judaical products.


 I didn't make the full step by step tutorial for this card, but I think that the written explanation will do the job.
So this is a partially transparent card and it was made with transparent piece that is hidden under the cardstock top.
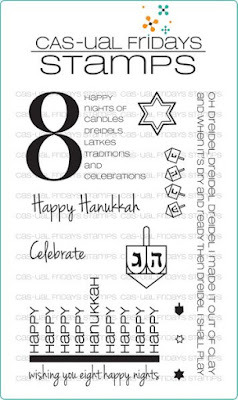
The transparency is embossable and I stamped two CAS- ual Fridays  8 Happy Nights sentiments one near another with Memento Luxe pigmented blue ink and heat embossed it with clear embossing powder.
Then the stamped transparency was glued to the back cardstock.
On another piece of white cardstock I glued CAS- ual Fridays Hanukkah Fri- dies, all of them , and then misted the fronts with a mix of blue mists.
When it was dry I cut the front into two pieces as shown and glued to the transparency.
The only embellishments added are silver drops added to the number 8 and over the card.


I also added a bit of light blue mist inside the card for the contrast under the transparency.


 As you can see the stamping on transparency can be quite perfect if you check the transparency and it's heat resist one.

 Here are the stamps I used to make this card:
 8 Happy Nights
Hanukkah Fri-dies


And now if you make Hanukkah projects- here is the best ever selection of such products - CAS- ual Fridays shop.
And you can even use my own discount code to buy you some great  goodies!


Friday 5 October 2018

Can't thank you enough card with CAS- ual Fridays


Hello my dear crafty friends ! Irit is here today and I am going to share my new card made with one of the most gorgeous CAS- ual Fridays stamp sets-Frankly.


 Usually I don't use patterned cardstock for my cards. But when the stamp is just a sentiment, even  the very large sentiment, patterned cardstock can be a great add to the design.
So for this card I used BoBunny patterned cardstock from Once in a Lifetime paper collection and added quite a few layers of this cardstock. The sentiment was also stamped over the patterned cardstock.
I didn't make the step by step photo tutorial, but I made a written one for you to follow.


Product list: Stamps- CAS- ual Fridays stamps
Frankly
Dies- craft shop
 Inks- Tsukineko
Embossing powders - Sparkle N' Sprinkle
Cardstock- BoBunny
Stickers, rub-ons, jewels- BoBunny

Step by step: 1. Die cut 6*4.5'' BoBunny cardstock rectangle as your basic card. Die cut the second smaller BoBunny cardstock layer and glue it over the basic layer.
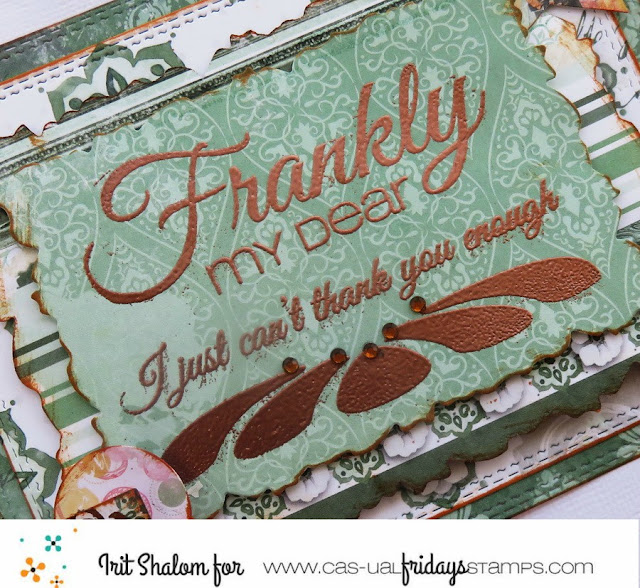
2. Die cut the shaped rectangle from the third BoBunny cardstock. Ink all three card layers with brown ink.
3. Stamp CAS- ual Fridays large sentiment with Frankly stamp set over another BoBunny cardstock and add the stamped ornament from the same set. Use VersaMark and copper SNS embossing powder. Die cut the smaller shaped rectangle and glue it over the card.
4. Glue BoBunny stickers. Rub- on BoBunny copper shapes over the stickers. Add some BoBunny jewels. 


So if you love this set as much as I do- HERE is the shop and my personal discount for you to use in the shop!
See you next month with more CAS- ual Fridays inspiration!

Irit

Popular Posts