Monday 28 January 2019

CAS- ual Fridays Vintage card

 Hello my dear crafty friends and welcome to my new CAS- ual Fridays post.
Today I am going to share a small tutorial of a card made with one single CAS- ual Fridays  Be stamp set.
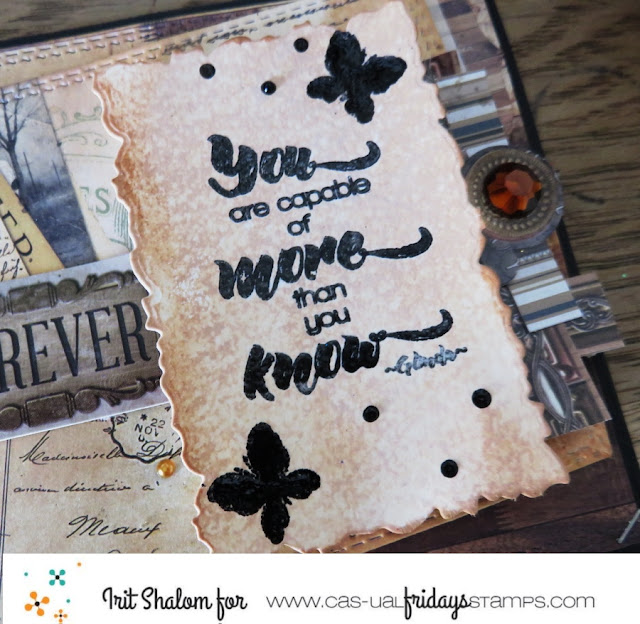
I try to make different cards and this time I am back to my beloved vintage style and made this card using BoBunny vintage collection as the base of my card and stamped the front with one of my most loved CAS- ual Fridays stamp sets called BE.

First I made the collaged background using patterned paper cuts only and arranging them in this vintage one over another kind of a mess.
Then I die cut a white cardstock piece and stamped one of the sentiments using black pigmented ink and clear embossing powder. I also added a couple of small stamped butterflies from the same stamp set.

Here is the stamp set used for this card.:

And here are  some close- ups to this card:


 See how easy it is to make the great vintage card with just one great CAS- ual Fridays stamp set.
 Hope that you like my  card and you still have time to buy yourself these gorgeous stamps from CAS- ual Fridays shop and even to use our  discounts.

Check the discounts and subscribe to our newsletter to get the best possible prices.
See you in two weeks with another lovely card made with CAS- ual Fridays products.

Friday 25 January 2019

Always give love mini album with CCB


 Sometimes all you need to make a lovely and easy project is a great paper collection, good nesting dies set and  perfect pair of scissors.This mini album cover is a great example of such a project.
Using only Compose you life 8*8'' paper pack and book shaped set of dies with a lot of fussy cutting of paper and cardstock flowers from this collection this old, almost 10 years old ) mini album with pink pages was done in less than an hour.
It's lovely and fancy and fits any girly photos.


Product list:
 Aga Baraniak- Compose your life 8*8 paper pack
Aga Baraniak- Compose your life Journal cards 
Tattered Angels -Crushed shells glimmer mist
Tattered Angels- Gold glimmer mist
Tattered Angels- Wedding pink glimmer mist
Book shaped nesting dies- Tattered Lace
Mini album
Tea dye Distress ink- Ranger


Monday 14 January 2019

Hoppy Birthday card with CAS- ual Fridays


Hello my dear crafty friends! Irit is here today with a new small card tutorial I made for CAS- ual Fridays blog.
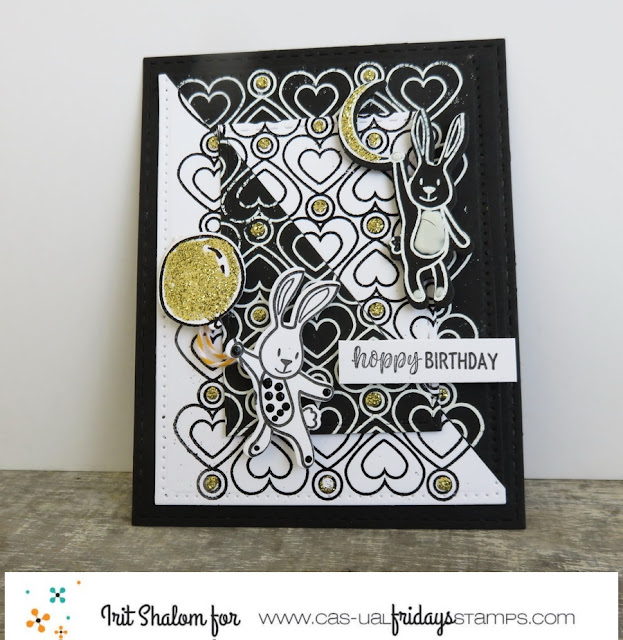
I used a cute stamp set and Fri- dies to make a black and white (with a touch of gold) Birthday card.
As you can see this card has minimum coloring and minimum embellishments.
Actually I only used glitter glue and some enamel drops to add gold touches and some coloring of the bunnies.


Here you can see the layering over the card :


And some close- ups too:


CAS- ual Fridays products used to make this card:
Bunny Fri- dies

Heart to Heart
Somebunny
And now for the tutorial:
1. Die cut two card bases in the A2 size- one black and one white.
Stamp the Heart to Heart background with black pigmented ink over white cardstock and heat emboss with clear embossing powder. Stamp the same background with VersaMark over black cardstock and heat emboss with white embossing powder.


2. Cut both stamped pieces diagonally . Glue two triangles over the black card  base as shown. Glue the two remained triangles on the back and die cut the smaller rectangle. Glue the smaller die cut  rectangle over the first one as shown.


3.Stamp the bunny image twice- one over black cardstock with white heat embossing and one over white cardstock with black embossing. Die cut both bunnies and one balloon as shown.Stamp the sentiment with permanent black ink.


4. Arrange the images over the basic card and glue them with 3d foam glue.
Add gold glitter glue and white, black and clear enamel dots as shown. Your fancy and yet easy to make card is done.


I hope that you like my black and white card and you  to buy yourself these gorgeous stamps from CAS- ual Fridays shop and even to use our  discounts.
Check the discounts and subscribe to our newsletter to get the best possible prices.


You can also use my own discount if you wish and sometimes you can even get the extra discount.


Thursday 10 January 2019

Christmas gift card holder and bookmark with BoBunny


Hello my dear crafty friends!
Irit from Irit Shalom Designs is here today with my second project made with the most adorable and newest Yuletide Carol collection.
This is a totally traditional Christmas collection- colors, designs and sayings .
 So I decided to make the totally traditional Christmas Gift card holder/card and to add a lovely interactive bookmark made with the same collection.


 As you can see the gift card holder is a standing card and the bookmark is made with the frame and inside moving piece.
I made the front with book shaped dies using different cardstocks and added distressing to the edges as this is a pretty much vintage collection.
The book pages were glued one over another and then embellished with Combo stickers, Layered chipboard, jewels and a couple of BoBunny dies were used to add the interest to this project.


 Here you can see all layers of this project when closed:


 And this is the " step" that holds this piece standing: made with cardstock, die cuts, stickers and BoBunny die cut sentiment arranged in 5 layers as a " chipboard" piece.


 The inside tag is glued on the top and on the bottom , so you can put your cash or your gift card under the tag.


 And here is the book mark- the " Joy" part can be used as a separate bookmark too.


 Product list:


Yuletide Carol collection 12'': O Tannenbaum, Presents, Joyous, Carol, Christmas
Yuletide Combo Stickers
Yuletide Layered chipboards
Yuletide Noteworthy die cuts
Christmas card dies
Tick Tock die
To and from dies
Belief dies
Double Dot Red Flourish jewels
Double Dot Emerald jewels
American Crafts Bottle green cardstock
American Crafts Sticky thumb glue runner
American Crafts Sticky thumb 3d foam glue

Thanks for being here with me today!
This was my last Christmas project made with two newest collection and see you soon again!

Popular Posts