Tuesday 29 May 2018

One stamp- three projects with SNS

Hello my dear crafty friends and welcome to my new Sparkle N' Sprinkle blog post.
Today I am going to share " same stamp- three project" crafty post.
I used same large single SNS stamp called Danielle and made three totally different projects with this beauty.
The first is this Mixed Media card and I made a full tutorial for you to follow in my own blog.


Product list:

Happy Birthday metal stencil Stampendous
Stencil Rebecca Baer
Water colors


 The card was made with artistic stencil, Nuvo glitter paste and then misted with Nuvo Mica mist for the background.
The lady's image was stamped over cardstock, heat embossed with black embossing powder and then covered with Masking fluid. When fluid was dry the more stamped image were added around using Pretty Blooms stamp set. 
Then the main image was colored, misted and added to the card.
The sentiment was done with the same Glimmer paste over stencil.
And as I said- here is the full tutorial for you to follow. And now a few close-m ups to this card:


And now for my second card today:


 Product list:

Stencil - Rebecca Baer
Alcohol inks- Ranger

The second Mixed Media card was made with the same stamp, but as it was stamped over the transparency I flipped it to another side. The image was then colored on the back with alcohol inks. The background was made with sticker paper, stencil and two SNS gorgeous glitters. First add the dark glitter over the stencil and then peel the stencil off and add  white color over the sticker bare spaces.
The sentiment was die cut several times and heat embossed with black embossing powder.
 And a couple close- ups to this card:


 The last project is a stamped Steampunk tag that was made with the same image stamped over transparency. But this time I made the " just add ink" coloring on the back as this is a totally free project and Steampunk is not intended for pretty coloring.
The chipboard pieces were all heat embossed with four different embossing powders in metallic colors.


Product list:
Embossing powder Timber SNS
Embossing powder Copper SNS
Embossing powder Gold Detail SNS
Embossing powder Black Detail SNS
Embossdable acetate
Alcohol inks- Ranger
Chipboards- Dusty Attic
Cardstock- BoBunny
Titles- Tim Holtz
And a few close- ups to this tag:


 And now for the full tutorial for the first card.
 1. Stamp and heat emboss the image with Timber SNS EP.


2. Cover the stamped image with Tonic Masking fluid and let it totally dry.


 3. In the meantime add Tonic glitter paste over the metal stencil to make the sentiment.


4. Stamp the flowers around the woman's image while covered with dry masking fluid.


 5. Peel off the dry fluid and cut as shown around the images.


6. Color the images with water color markers.


 7. Mist the colored images over with Tonic Mica mist.


8. Make the glitter paste background with Tonic glitter paste and then mist with Tonic Mica mist.


9. Arrange the stamped image over the card as shown and add the black background cardstock.Hand cut and color the sentiment and glue it over the card.


Thanks for being here with me today and I hope that you like my " same, but different" projects.

Sunday 27 May 2018

Amazing moments altered cross stitching hoop


 My altered cross stitching hoop made for a few challenges :

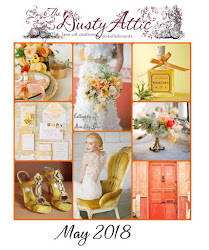
Dusty attic moodboard- Inspired by colors and flowers, browns and pinks mostly. Also inspired by vintage/antique look and made with tons of their chipboards

May 2018 Mood Board
Mixed Media place- moodboard. I was inspired by light pink flowers and all circle shapes on this moodboard and colors.


Imagine card with Magenta

Hello my dear crafty friends!
Welcome to my second May project made with the most gorgeous Magenta products.


This Mixed Media card was made with stamped and heat embossed image on the background. Then the same stamp was stamped again colored and hand cut. The stencil background was made after the stamping just to add more interest to the background of this card.


I made a small step by step tutorial for you to follow (no step by step photos, but it's an easy steps to recreate).


Step by step:1. Die cut the thick white cardstock card front. Stamp the main Magenta image with VersaMark and heat emboss with black SNS powder.
2. Add small butterflies with texture paste around the stamped image over Magenta stencil and let it dry.
3. Mist the card front with TA mist.
4. Stamp the same flowers again. Hand  cut them and color with alcohol ink and add a bit of red around with marker. Arrange the flowers over the card and glue them with 3d foam glue.
5. Stamp the leaves and cut them. Color with yellow alcohol ink and heat emboss over with clear embossing powder.
6. Arrange and glue the leaves. Add random sequins and stamp the sentiment.


*****

Produits Magenta utilisés:
Magenta products used:


14.664


07.901


TM28

Thanks for being here with me today and see you soon again!
Irit Shalom- DT Magenta


Saturday 26 May 2018

Imagine - John Lennon altered canvas


My altered canvas that was made as a tribute to one  and only John Lennon.
Made for some web challenges.
Simon Says Monday challenge- Inspired by a song


Wednesday 23 May 2018

Greateful heart with SNS May reveal


Hello my dear crafty friends and welcome to my third  Sparkle N Sprinkle May reveal post.
This card was made with the new and most delicious Cardinal and Holly stamp set, but yet because of the different sentiments in this set I made it just as Grateful  card.
I made the layered squares background over Sticker paper and left one single square to be covered with red glitter. 
The stamped and heat embossed image was colored with water color markers and clear Nuvo drops were added over the berries and as random drops of water over the card.
The blue mist was added then for more interest over the white frames.

Product list:
Cardinal and Holly stamp set # 895
Zig Brush Markers
Cardstock AC
Blue watercolor mist self made
Dies- craft shop

Here are some close- ups to the card:


And as always - my step by step tutorial for you to see and to use!

  Step by step tutorial:

1. Stamp the main cardinal image with VersaMark and heat emboss with Black Detail embossing powder.


2. Die cut  the nested square frames and die cut the stamped image to the smallest one.


3.Die cut the Sticker paper to the largest square and arrange the frames over it as shown.


4. Color the stamped image with Zig water color markers.


5.  Mist the whole frame with blue water color mist (not shown on photos).
Glue the colored square and fill the square gap left with Fire Engine glitter.


6. Add Morning Dew drops over the berries.


 7. Stamp and die cut the sentiment and glue it over the card.

Thursday 17 May 2018

Family mini album with BoBunny and video tutorial

Hello my dear crafty friends and welcome to my BoBunny video tutorial post.
I made a small, card size mini album with a new and most adorable BoBunny collection named Once upon a Lifetime. 

Family mini album by Irit Shalom


This is an easy to make project and I decided  to make it without any fancy Mixed Media add- ons so the crafters on any level can make the same album. 
If you like you sure can add stamping, stencils, mists and more mediums on the cover or inside pages, but I decided to  leave it  as is and the cardstock is so beautiful  that you don't really need to add anything.

Here  are some photos to show it and then you can see the full step by step video tutorial and to make a very similar mini album for your own family and your own memories to keep inside.

 This is how it looks from the top:


And from the spine side- one single layered  chipboard was added to the spine:


More close- ups to the album:


 And here are some of the inside pages:


Product list BoBunny:
Once in a Lifetime collection 12*12'' cardstock:
Once in a lifetime, Ancestors, Discoveries, Grandparents, Generations, Traditions, Heritage, Namesake, Pedigree, Relative
Once in a Lifetime Combo Stickers
Once in a Lifetime Layered chipboard
 Denim Blue Zinnia
Denim Blue Bouquet
Denim Blue Lace
Blue Jewels

WRMK Flower Punch Board
AC Sticky Thumb foam dots
AC Sticky Thumb adhesive runner

 So here is my video tutorial and I hope that you like my album and would try to make a similar project with this most beautiful vintage BoBunny collection!


Popular Posts