Friday 30 June 2017

CAS-ual Fridays Tic Tac Toe challenge


Hello my dear crafty friends and welcome to our Tic Tac Toe CAS-ual Frdays challenge!
This is a Tic Tac Toe board that you can use to make this challenge.

No automatic alt text available.
For my take of the card I used the lower horizontal line with Shaker card- Rainbow and texture.
 As you can see the focal point of the card is a shaker.
The texture was made with texture paste and a stencil. The rainbow colors were added using Ranger's alcohol inks in 6 colors.
 I used a stamps from CAS-ual Fridays Dream, then Do set that was stamped with pigmented ink and heat embossed with black powder. This is the only way to mist the stamped image without damage to the stamped image.


There are no genre restrictions for this challenge. Link up your clean and simple designs or layer it on -- the choice is yours.  Make sure to link back to this blog post and include the graphic below in your post for consideration of being chosen a winner.
What are your playing for? 10 winning entries will be highlighted on this blog each Thursday before a new challenge is set to go live the next day.  In addition, Michele has generously offered up a $25 gift certificate to the overall winner at CAS-ual Friday stamps. And if that weren't enough, if the chosen winner has used CAS-ual Friday stamps and/or dies as the main focus in the card, that gift certificate will increase to $50.


So don't wait! Play with us and you can be our WINNER!

Thursday 29 June 2017

Tando Antiquing project


Hello my dear crafty friends and welcome to my last Tando project for June.
This is our Antiquing week in the blog and I think that this altered project looks totally antique.
I made the background with a few Tando stencils and black modelling paste and you can see list later in this post.
Then I misted the background and got this divine textured look with golds, coppers and silvers all around.
One single part of Tando rectangle tray was added over the background and then I arranged more Tando chipboards together with a lot of metal pieces to make the whole Steampunk board.
 I think that my flying scull looks just perfect with all those antique colors.
Don't you like it too?


I wnter this to some web challenges:
 Mixed Media and Art- Themed challenge-Handmade background and letter
Thematic challenge for June

Artistic stamper- Wings
Simon Says Monday challenge- Stencil it

Wednesday 28 June 2017

Art Anthology Life in color art page


 This is a new art page I made with my new (lost and found on the way) Art Anthology art supplies.
I use three new stencils, tons of new Velvet paints, a few new Colorations sprays and some  pretty old chipboards to make this rainbow colored art page.
Life should be full of colors!
And you just need to arrange those colors to make your own rainbow, as I did here!


And as always- here is the full Snapguide tutorial for you to see and to use HERE:
Check out How to Make Mixed Media Art Page by Art Anthology on Snapguide.
I also enter this art page to some web challenges:
Simon Says Monday challenge- Stencil it
 Country view- Hearts

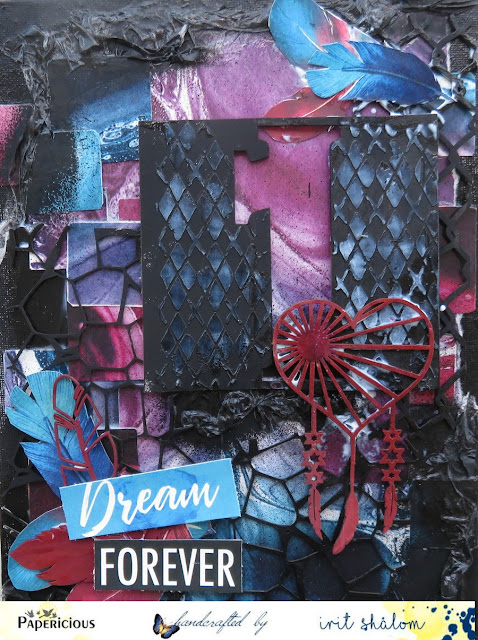
Papericious Indie Chic tutorial: Forever Dream Mixed Media canvas

Hello my dear crafty friends!
Irit from Irit Shalom's Designs is here today and I am going to share a full step by step Mixed Media canvas tutorial made with the most gorgeous new and just released Indie Chick Papericious collection.
This is a project I made for this blog post using the flat canvas, Papericious paper collection and chipboards, left over tissue paper and a lot of art mediums. 


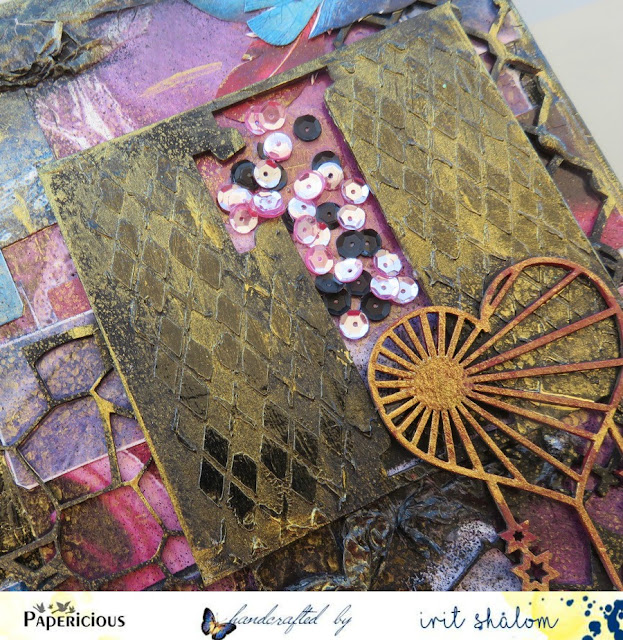
Here you can see this canvas without the staged photo and to see more details.


And before I move to my step by step tutorial here are some close- ups:


 And now for the full tutorial:
1.Paint the flat canvas with black Papericious Heavy gesso and let it dry. Tear a piece of cardstock from Indie Chick collection to cover the painted canvas as shown.

2. Hand cut squares from the second Indie Chick cardstock and glue them over the canvas as shown.


3. Paint the Papericious chipboard pieces with black acrylic paint.The #1 is half of the Papericious #1 chipboard negative that was left after I used it on another project.


4. Use translucent embossing paste and a stencil to add texture to the flat black chipboard.


5.Glue the painted chipboards over the canvas as shown. Glue torn white tissue pieces around the chipboard shapes and let the liquid glue dry.


6. Spray the canvas with black mist.


7.Hand cut a fee feathers from another cardstock and then paint a few chipboard shapes with the similar dark red paint.


8.Glue the feathers, the painted chipboards and the hand cut sentiment (from the same delicious paper collection) as shown.


9.Add Crackle Glaze medium around the canvas and a bit over the tissue .  Cover the paper title with glaze too. Let it dry.


10.Spray the finished canvas with gold mist all around. Add Papericious sequins inside the #1 chipboard using Glossy Accents as your glue for the sequins.


I hope that you like my Mixed Media canvas and my small tutorial.
I enter this canvas to a couple of web challenges:
Simon Says Monday challenge- Stencil it
Altir Art- Chipboards
Vintage journey- Canvas
 Country view- Hearts

Best Wishes to your new home card with Scrapmatts


My new fancy card made with a lot of Scrapmatts chipboards in a very nice pastel colors.
This can be a card for a new home or just the general card with Best Wishes sentiment.
I used Scrapberry's cardstock for the background and then added Scrapmatts frame that was painted with light shabby green paint.
Two housed were painted with more of the shabby paint colors and added over the basic cardstock.
Then each house got a sign: one got this Home arrow sign and the second got the sentiment on the top.
Some flowers were added for the texture and the interest.


 Scrapmatts products used:
CB5121 Houses 01
CB6105 Assorted words 23
CB6092 Ornate frame 20
CB1244 Scrap Words 30
 I enter this card to some web challenges:
 Simon Says Wednesday challenge- Anything goes
Altair Art- Chipboards

Tuesday 27 June 2017

BoBunny Media post: painted wooden coasters


Hello my dear crafty friends!
Today I am going to share my  " no paper" BoBunny and Pentart project.
This time I made a set of wooden altered coasters using 6 different Pentart paints that were diluted with water to give the wood this wash paint effect.
Then I stamped over the box and each piece with black pigmented ink, 3 different BoBunny stamp sets and heat embossed each stamped image with black embossing powder.
Later the stamped images were painted with new Delicate Gold Pentart paint.
This is a project that is easy to make and fun to use!


Scrapmatts tag

This fancy bright altered tag was made with texture background made with Scrapmatts stencil and texture paste and them painted over with liquid acrylic paints. 
Each chipboard piece was painted with black actylic paint and glued over the tag.
The sentiment is from Prickley Pear Rubber stamps.


Let me show you the texture from the side of the tag:


And now to some close- ups of the project:


I enter this to Simon Says Stencil it challenge- the background was made with double stencil


Memories layout with Scrapmatts

  Hello my dear crafty friends!
This 12*12'' layoutwas made with my lovely daughter and my granddaughter photo on my DD wedding day.
I still continue to scrap my second daughter's wedding day (it will take forever...) and this is her photo with her beloved 3 years old niece.


Each chipboard piece was painted with DecoArt paints and then I added quite a thick layer of DecoArt
Crackle glaze over the dry paint.


Some darker paint was added into the dry cracks and you can see the fantastic result on this big rose here:


 I also added some clear glitter circles using Scrapmatts 9007 Circles stencil, but it's hard to see on the photo.
You can see a bot of the glitter circles here on this close- up:


Another look at the painted chipboards:


I used Kaisercrafts paper collection for this page and entered it to their challenge and added quite a few Scrapmatts chipboards as my only other embellishments.
 And 1-2-3 Challenge blog for White- Bling and Love

 I also emtered this piece to Berry71bleu inspirational challenge- girl with flowers on the corner was my inspiration and Summer too.

June 2017 Challenge

Sunday 25 June 2017

Happy Fathers day Mixed Media tag with Scrapberry's

Hello my dear crafty friends and welcome to my second June post made for Scrapberry's.
This month we celebrate Fathers Day. So it was a great occassion to make something for this celebration.
I decided to make a Mixed Media tag with Scrapberry's products and to show that you can add Mixed Media products  to non Mixed Media line.
So with some stencils, paints, Steampunk chipboards added I got this fancy Steampunk Fathers Day tag:

  Each and every paper piece on this project is from Scrapberry's Words Live Forever collection.
There quite a few layers and I made a side photo shot to show you all these layers:


I added some stencilled words on the second top layers, but after I covered it with the top layer and the embellishments it's hardly seen.
The top layer was made with a stencil, texture paste and shimmery embossing powder.
All chipboard piece were painted with DecoArt paints and then covered with crackle glaze and misted over when dry.
The Scrapberry's metal wings and resin bird were painted with a mix of delicate acrylic paints.
Then I made layered die cut sentiment and heat embossed the paper with black powder.


 So as you can see this Sscrapberry's collection is a perfect fit for any masculine, Steampunk and Mixed Media project.

I enter this tag to some web challenges:
Simon Says Monday challenge- Stencil it
Chipboards- Altair Art

Popular Posts