Wednesday 31 August 2016

Going wild art tag


Hello my dear crafty friends and welcome to my second August post made for Susan K. Weckesser blog.
This time I made a small tutorial for this lovely easy to make tag and it's just great technique for all of us who are not coloring artists.
So here is my tutorial for you:

1. Use Susan K.Weckesser's Unity The Garden Whatnot collection  tag (one of three) and stamp the image over the white cardstock with Susan's ColorBox Color Pop mini Mystery black ink.


2. Stamp the second tag from the very same Unity stamp set with the same ink and punch the 2'' circle with a circle punch (or use a die to die cut the circle).


3. Ink the stamped tag and the punched circle with Susan's ColorBox Color Pop mini inks in Ice and Fresh colors as shown. You can wipe the ink if it's too intensive.


4.Hand cut the basic tag from gold cardstock and add the second tag layer using Susan's Live in Color (backside) cardstock. Ink the patterned cardstock edges with ColorBox Color Pop mini ink in Shimmer (gold).


5. Stamp the owl image from Susan's Going Wild new released stamp set with Shimmer ink and heat emboss it with clear embossing powder. Hand cut the image and ink inside with a light layer of Cocoa Color Pop mini ink.
Stamp the sentiment with the same set and the same Shimmer ink; heat emboss the sentiment with clear powder. Hand cut the sentiment and ink with a light layer of Ice  ink and ink the edges with gold ink.
Arrange the tag as shown. Add a small yellow feather and a lace ribbon on the top of your tag. 


I really hope that you liked my small tutorial and Susan's delicious products!


Tuesday 30 August 2016

Thanks friends card with Two Paper Divas


 Hello my dear crafty friends and welcome to my last, already 5 th post, made this month for Two Paper Divas stamp company.
This time this is a multi layered card with just one stamped sentiment on the top.
But this is 4 pieces the most perfect sentiment set called
Silhouette Circles
 I picked the Friends circle and stamped it with red ink to fit the card colors.
All papers are from DCWV stack and all dies are Die Versions.
I hope you do like this card as much as I do!


Monday 29 August 2016

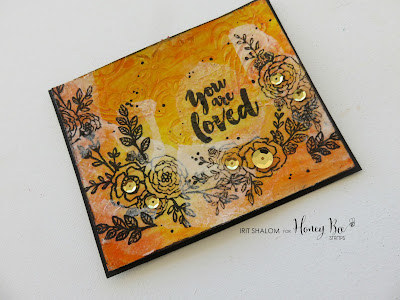
You are loved card with Honey Bee stamps


Hello my dear crafty friends and welcome to my last Honey Bee Stamps post for August.
This time I made a totally Mixed Media card with tons of mediums, paints, mists and texture and yet it is a totally flat card after all. The Miracles of Mixed Media are here!
I used Rebecca Baer stencil with modelling paste to make the not so much seen background (look close, it's there). Then I  colored the background with a mix of Tattered Angels mists and paints. After the background was all dry I stamped the Honey Bee flowers and a sentiment on white tissue and glued it over the background with Gel Medium.
Stamps used here are Honey Bee Stamps:Country Blooms and  Beautiful life! Perfect, perfect. perfect for any stamping occasion!


Just a few gold sequins were added and this fancy card was all done!
There are much more of my projects on my Instagram account @iritshalom2000 and you are welcome to follow me there!

Saturday 27 August 2016

Mixed Media canvas with BoBunny


Hello my dear crafty friends and welcome to my Mixed Media canvas first ever video tutorial!


Let's say that this was the hardest thing  I've ever crafted and there are a lot of reasons for this Mission Impossible issue.
First I got my products as BoBunny Round 2 finalist on June 19 ("huge thanks" to Israeli customs that kept my  custom free package for 2 whole weeks without any reason and then sent it to the wrong post office  without the electric power for 3 days and impossible to get the " must electronically sign" package). 
The original date to submit the projects was June 23. Also BoBunny extended the due date my  own due date was June 23, as on June 24 we already had booked and paid vacation trip to Poland. 
So for me it was like " do it today and whatever will be- will be".
For the crafter who never made even a 30 second video clip it was a nightmare.
I had to find a good camera (dear Husband's smartphone). I had to find the spot to film it ( low living room table was the only one that  was a good fit, but  BAD one after all as I worked from the side sitting on my knees). I filmed it three times and the last one was  the best of all poor attempts. 
It took me ages to edit it on the only free program that I had on my pretty old PC that refused to upload the better program.
I made a trial upload  to You Tube without any music or final photos and then the most awful thing happened: my Movie editor died. Like I can't edit on it more and couldn't even think about all new process.
So I added a  bit of music with You Tube and that was it.
We are leaving to Poland in a couple of days. I still had the second, not video, project to make for BoBunny audition.
I had family issues with sick family members that  I needed to take care of. 
I like my final project and I hate this video thing... I am deep on minus infinity spot on my learning curve and don't have any spare time or products to make the new film.
So I made this post with this video link  just to show you my Mixed Media canvas made with my adorable daughter's wedding photo and I cross my fingers for the best. 
At least I tried. I didn't gave up. I made my best with the impossible time lines. My family and friends told me told to give it up. I cried a lot, but I made this video and maybe it will be my very first and my very last one as I am much better with step by step photo tutorials that I really love to make. 
Hope you like my project and thanks for reading this blog post after all.
And this is a video tutorial link here:

So this is my Mixed Media Vintage altered canvas here.
All products are from BoBunny and if there was not right color I just made them with tea and coffee stains.


Look at some close- ups:


Thanks for reading this post and watching my very first video attempt.

Friday 26 August 2016

Shalom is my name, warm hello and peace - print published card

This lovely CAS card was  already print published in Scrap N' Stamp Arts magazine in the Foreign language cards column.
 I used old The Rubber Cafe stamp set with three different inks and clear heat embossing over all three squares. The Hebrew  Shalom means Hello and Peace and this is our family name too.
So this is a card for us as a family: we all sa you a Peacful Hello!


Thursday 25 August 2016

Holidays tag with Die Versions

Hello my dear crafty friends and welcome to my new Die Versions post.
I know that it's just August. But when you make project form print you mostly craft Christmas in March. And so it was with a few of my projects that I am going to share in a couple of next months.
I still don't know if this fancy tag was print published as I didn't get the issue, but the issue is already in shops, so I can share it and you can try to make a similar  gift tags in advance.
The tag was made with Canvas Corp 7 Gypsies paper and a lot, and I mean ALOT, of Die versions die cuts.
I used two sets of nested dies here:
Nested Stitched circles and Nested Stitched Combo.
The circles were arranged on the top of the tag and the sentiment was layered over rounded squares die cuts.
Usually the basic dies are for matting. I use them as the main embellishments over some of my projects and I am totally in love with this nested stitched line. I still need to buy some more that I don't own yet!


And those are dies used to make this tag:

Whispers - Stitched Nesting Combo


Whispers - Stitched Nesting Circles


Wednesday 24 August 2016

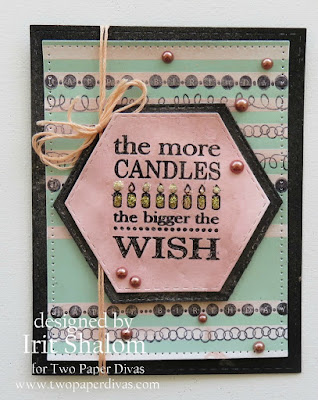
The more candles card with Two Paper Divas

Hello my dear crafty friends and welcome to my new Two Paper Divas post!
This time it's a Birthday card with not so usual  Birthday sentiment and I love it a lot!
I used new stack from DCWV and I stamped Two Paper Divas borders using All About Borders stamp set over the stripes. One of the stripes says " Happy Birthday". But then I added a huge sentiment with another Two Paper Divas set called More Candles I stamped with black pigmented ink and heat embossed with clear powder. Then the whole card was misted with light pink Tattered Angels mist and I added some glue glitter over all candles on the sentiment.
The dies used here are Gina Marie nested dies and my final embellishments were some pearls and a piece of thread in the same  pinkish color.


Monday 22 August 2016

Sending Happy wishes to you card with Honey Bee stamps

 Hello my dear crafty friends and welcome to my new Honey Bee Stamps post!
This time, after quite a few Mixed Media pieces I made a card and I am very happy with the result.
As you see this is a Kraft Cardstock based card and stamping with white heat embossing over the Kraft cardstock  gives us an amazing result.
So I used Honey Bee Stamps Color my World set to stamp all flowers around this card using clear embossing ink and heat embossed the images with white embossing powder. I made masks to make the flower clusters ass well.
The lower flowers were stamped second time, hand cut and colored with Zig Real Brush markers that I love a lot lately.
Then I added them over the basic stamped layere with 3d foam glue.
The sentiment was made with Honey Bee Happy Everything set that is a most perfect sentiment builder ever!


Sunday 21 August 2016

Delightful layout- just because I had time


This new layout is made for DCWV July sketch challenge with their entire Primrose stack and the add ons of DecoArt mediums and Rebecca Baer stencils.I added some SRM clear stickers as the stitches that connect both flowers photos and the words of journalling over the tag.


Saturday 20 August 2016

Thanks MM card with DV-Craft Stamper


This Mixed Media card was already in print in UK Craft Stamper August issue.
Made with Impression Obsession stamps, Tattered Angels mists and Die Versions sentiment die.


Friday 19 August 2016

Tando Anything goes


 Hello my dear crafty friends and welcome to my new Tando post and this week it is Anything goes week.
So  how about a Steampunk door hanger?
Tando sells the most amazing chipboard door hangers and you can alter them to any kind or theme.
But sometimes  you have someone a bit Steampunky around you and that's what I made for this person.
So I picked the Door Hanger style A piece (one of 2 that are in the bag) and the fun began!
As a background I used Tando Cogs mini stencil  and Tando Giraffe mini mask with DecoArt  White Modelling paste.
When it was dry I added layers over layers of DecoArt Media line  fluid acrylics paints to make the background and stamped randomly with black paint using Stampendous  Toxic stamp background.
Then I painted the chipboard Scull from Sculls bag 3 and Key hole from Locks and Latches set  using the same acrylic paints with a layer of DecoArt Weathered wood medium and you can see the glorious result of this medium over the main chipboard pieces here.The key from Set of 5 keys was added to the piece as well.
I made the title with Tim Holtz small stickers and yes, anyone, even the scull, can be beautiful.
Don't you think so?


Thursday 18 August 2016

Holiday tag- so what if it's August?

Hello my dear crafty friends and welcome to my new Die Versions post.
I know that it's just August. But when you make project form print you mostly craft Christmas in March. And so it was with a few of my projects that I am going to share in a couple of next months.
I still don't know if this fancy tag was print published as I didn't get the issue, but the issue is already in shops, so I can share it and you can try to make a similar  gift tags in advance.
The tag was made with Canvas Corp Christmas line cardstock as a double tag for more interest.
The bows are stamped (Rubber Dance), but the main embellishment is Die Versions most gorgeus die called Pine cone arrangment.

Whispers - Pine Cone Arrangement
After the die cut was made I painted the white cardstock die cut with watercolors and heat embossed it all over with clear embossing paint. I added red cardstock with glitter under the die cut bow and stars as you can see.


I hope you got some Holidays inspiration today and more to come next week!


Wednesday 17 August 2016

Holidays door hanger with Rebecca Baer

 Hello my dear crafty friends and welcome to my second post made for Rebecca Baer.
This door hanger was made for possibler print publication and so far I don't know if it made the print after all. But as the said magazine is already published I can share this project and I think that it's a lovely Holidays door hanger in a totally non traditional colors here.
The background is Tando chipboard door hanger . Then I added the texture with Rebecca Baer Snow Flurries stencil and white texture paste.
The whole piece was misted with Tattered Angels mists and you can see how lovely the colors and the texture are after it's dry.
I added two Tando chipboards  painted over and stamped the texture over the ornaments with Two Paper Divas stamps and white heat embossing.
The sentiment was stamped in the same way and added inside the chipboard frame.


And now let's hope that the magazine editors loved this piece and it is in print after all!


Thanks for making my life Sparkle with Two Paper Divas


Hello my dear crafty friends and welcome to my third post in August made for Two Paper Divas blog!
Today I just stamped one single sentiment on a very  much die cut card, but what a lovely sentiment!
I used Two Paper Divas stamp from the pretty new and most adorable Yes to Sprinkles 2 stamp set.
It was stamped over patterned cardstock and heat embossed with clear powder.
The cardstocks used here are from the very new DCWV stack and I used Sizzix and Die Versions.


Tuesday 16 August 2016

Live in full color art piece with Susan K. Weckesser


Hello my dear crafty friends and welcome to my first August inspiration made for Susan K. Weckesser blog.
Today I am going to share an art piece made with Susan's stamps, cardstock, inks and stencil and I made a small tutorial for you to follow.
So here we go!
1. Cover a thick cardstock with white gesso and don't try to make it perfect. We do want  those not so perfects borders after all. Let the gesso dry.


2.Use Susan's Doodle stencil randomly over the page with texture paste and make some vertical lines as shown.


3.Stamp the flowers and the leaves with clear embossing ink and heat emboss them all with black embossing powder. The flowers and the leaves are Susan's K. Weckesser co-branded with Untiy stamp set In my Garden. Add the background colors with Susan's Clearsnap mini Pop inks in Kiss, Fresh, Ice and Sky colors. 


4. Paint the stamped images with Tattered Angels High Impact paints. Those paints are  thick and even look as 3d paints.


Glue the cut cardstock title using Susan's Live in Color Tags and glue it over the page. Inks the edges with Susan's Cocoa mini Pop Clearsnap ink.


And some more close- ups to this finished art piece:


And the whole piece again:


I really hope that you liked my art piece and see you again in about two weeks!

Popular Posts