Showing posts with label heat embossing. Show all posts

Friday, 8 February 2019

Best floral day ever card with CAS- ual Fridays

Hello my dear crafty friends and welcome to my new CAS- ual Fridays post.
Today I am going to share my new lovely floral card of a card made with one single CAS- ual Fridays  background stamp set and one CAS- ual Fridays die .
I know that it's a Winter around, but here in Israel it's a kind of a Spring and I was in this bright mood and this is how this card was born.

The background floral set was stamped with black pigmented ink and then heat embossed with clear embossing powder.
Then I colored the floral background with watercolor markers.
Here are the CAS- ual Fridays products that I used to make this card:


And some more photos of this card:

The title was die cut and then covered with black embossing powder and I tried to leave the part of the title non covered as the shadow.

Black enamel drops were added as my flower centres all over the card.


See how easy it is to make this lovely floral card with just one great CAS- ual Fridays stamp set and one single die. You sure can change the floral colors and the title can be die cut from colored cardstock or painted in another color.
 Hope that you like my  card and you still have time to buy yourself these gorgeous stamps from CAS- ual Fridays shop and even to use our  discounts.

Check the discounts and subscribe to our newsletter to get the best possible prices.
See you in two weeks with another lovely card made with CAS- ual Fridays products.

Monday, 28 January 2019

CAS- ual Fridays Vintage card

 Hello my dear crafty friends and welcome to my new CAS- ual Fridays post.
Today I am going to share a small tutorial of a card made with one single CAS- ual Fridays  Be stamp set.
I try to make different cards and this time I am back to my beloved vintage style and made this card using BoBunny vintage collection as the base of my card and stamped the front with one of my most loved CAS- ual Fridays stamp sets called BE.

First I made the collaged background using patterned paper cuts only and arranging them in this vintage one over another kind of a mess.
Then I die cut a white cardstock piece and stamped one of the sentiments using black pigmented ink and clear embossing powder. I also added a couple of small stamped butterflies from the same stamp set.

Here is the stamp set used for this card.:

And here are  some close- ups to this card:


 See how easy it is to make the great vintage card with just one great CAS- ual Fridays stamp set.
 Hope that you like my  card and you still have time to buy yourself these gorgeous stamps from CAS- ual Fridays shop and even to use our  discounts.

Check the discounts and subscribe to our newsletter to get the best possible prices.
See you in two weeks with another lovely card made with CAS- ual Fridays products.

Monday, 14 January 2019

Hoppy Birthday card with CAS- ual Fridays


Hello my dear crafty friends! Irit is here today with a new small card tutorial I made for CAS- ual Fridays blog.
I used a cute stamp set and Fri- dies to make a black and white (with a touch of gold) Birthday card.
As you can see this card has minimum coloring and minimum embellishments.
Actually I only used glitter glue and some enamel drops to add gold touches and some coloring of the bunnies.


Here you can see the layering over the card :


And some close- ups too:


CAS- ual Fridays products used to make this card:
Bunny Fri- dies

Heart to Heart
Somebunny
And now for the tutorial:
1. Die cut two card bases in the A2 size- one black and one white.
Stamp the Heart to Heart background with black pigmented ink over white cardstock and heat emboss with clear embossing powder. Stamp the same background with VersaMark over black cardstock and heat emboss with white embossing powder.


2. Cut both stamped pieces diagonally . Glue two triangles over the black card  base as shown. Glue the two remained triangles on the back and die cut the smaller rectangle. Glue the smaller die cut  rectangle over the first one as shown.


3.Stamp the bunny image twice- one over black cardstock with white heat embossing and one over white cardstock with black embossing. Die cut both bunnies and one balloon as shown.Stamp the sentiment with permanent black ink.


4. Arrange the images over the basic card and glue them with 3d foam glue.
Add gold glitter glue and white, black and clear enamel dots as shown. Your fancy and yet easy to make card is done.


I hope that you like my black and white card and you  to buy yourself these gorgeous stamps from CAS- ual Fridays shop and even to use our  discounts.
Check the discounts and subscribe to our newsletter to get the best possible prices.


You can also use my own discount if you wish and sometimes you can even get the extra discount.


Friday, 28 December 2018

You're the tweetest card with CAS- ual Fridays

 Hello my dear crafty friends and welcome to my new CAS- ual Fridays post.
Today I am going to share a small tutorial of a card made with one single CAS- ual Fridays  Little Birdies stamp set  and it's actually one layer card (plus basic card ).


This is a kind of a Mixed Media creation as it was done with distress inks, heat embossing, water splashes and masking fluid, but finally it looks non messy and very cute.


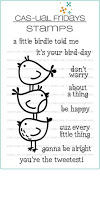
This is the stamp set used to make this project:


Little Birdies
And here is a small tutorial I made for this card:

1. Stamp the birdies with pigmented black ink and heat emboss with black fine embossing powder.


2. Cover the stamped image with masking fluid and let it dry.


3. Make oval template that covers the card and use distress inks to ink the inside oval over the stamped and masked image.


4. Peel the masking fluid off the image as now it's like a rubber.


5. Color the birds with watercolor markers.


6. Stamp the sentiment from the same set using permanent black ink.


7. Add a drop of water to distress inks and make splashes over the card. Let it dry.

 Your card is actually done. Add the base and give it to a good friend !

I hope that you like my cute friendship card and you still have time to buy yourself these gorgeous stamps from CAS- ual Fridays shop and even to use our  discounts.
Check the discounts and subscribe to our newsletter to get the best possible prices.
See you in two weeks with another lovely card made with CAS- ual Fridays products.


Sunday, 9 December 2018

Merry Chrismas without red and green with CAS- ual Fridays

Hello my dear crafty friends! Irit is here today and I am going to share my new  CAS- ual Fridays Christmas card made without any green and red colors, but in some mew for me non - traditional Christmas color combo.

 The basic card was made with BoBunny Christmas patterned cardstock, but in each and every circle I stamped a single CAS- ual Fridays snowflake.

The sleigh was first stamped using Sleighride largest stamp and heat embossed with gold embossing powder. Then it was die cut with matching Fri- die and arranged over the lower die cut layer (just for the layering).
The inside part of the sleigh was die cut from patterned cardstock and then more similar snowflakes were stamped and heat embossed with the same gold powder.

The sentiment from Merry set was stamped over same patterned cardstock and hand cut around. It was stamped with blue pigmented ink and heat embossed with clear embossing powder.
 The only embellishments I added are enamel drops in gold and blue.
Products used:


I hope that you like my non- traditional card and you still have time to buy yourself these gorgeous stamps from CAS- ual Fridays shop and even to use our daily discounts.
Check the discounts and subscribe to our newsletter to get the best possible prices.
You can also use my own discount if you wish and sometimes you can even get the double discount.


Friday, 9 November 2018

Happy Hanukkah with CAS- ual Fridays

Hello my dear crafty friends! Irit is here today and I am going to share one more Hanukkah card.
Hanukkah is just around the corner and as CAS- ual Fridays have the most beautiful Hanukkah stamps and Fri- dies this is a time to get yourself a few new items from the shop and to make a few new Hanukkah cards.
This time I decided to stay with die cutting  only and there is no stamping on this new card. But then there are a few background techniques that can be useful for non  stamping crafters or for these who want to make a set of cards with just dies and to try some Mixed Media easy techniques.


This card was made over the thick white cardstock without any patterned paper (not so much of  Hanukkah cardstock can be found in the shops).
I tried to stay in our traditional Hanukkah colors of blues and silver, but believe me you can use purples and gold, black and white or even reds and oranges of candle flames.
This is how it looks from the side: flat and fits the regular cheap mailing envelope.


And here is the main part- with both CAS- ual Fri- dies.


I used two sets of dies for this card: the first is the new and just released Happy Hanukkah Fri- dies set and the second is the older,but still much loved ........ Fri-n dies set.


Happy Hanukkah


And I made a full step by step photo tutorial for you all too.

1.Cover the card front with 3 strips of painters tape (repositionable tape to use for painting lines).


2.Use inks (I used American Crafts Mixed Media inks for this card) to ink the first strip on the card and then move the strips and ink all other parts with different blue ink colors.


3. Die cut the Star of David as shown and then arrange it inside with colors in the different spots.


4. Cover the card front with the stencil and use translucent texture paste over the stencil.
Let it dry for a few minutes.


5. Heat the dry paste and use silver foil and bone folder to add some distressed silver foil over the stencilled parts. This is not the usual way to use the foil, but  it worked without any laminators or other fancy tools. Anyway all I wanted is the get some silver over the texture paste lines, not to foil the stamped images.


6. Add some silver glitter drops over the die cut star as shown and let them dry.


7. Die cut the Happy Hanukkah and heat emboss it using VersaMark ink and glitter blue embossing powder.


8.Arrange the card and add more glitter glue drops over the card front.
Happy Hanukkah to you!

 I really hope that you like my Hanukkah card and my small tutorial.

And if you want to buy our fantastic Hanukkah dies in the shop- here is my discount code  for you to use:

See you soon again  with more CAS- ual Fridays inspiration!

Irit

Popular Posts