Wednesday, 11 July 2018

Bravo eclipse card tutorial with CAS-ual Fridyas


Hello my dear crafty friends!
Irit from Irit Shalom Designs is here today with my very first post made for CAS- ual Fridays main company team.
About  a year and a half ago I was asked by CAS- ual Fridays owner Michele to make some guest design for the company release.
From there I became a member of their challenge blog design team for a year and now lucky me moved to the main inspiration  blog.
So from here on you will see my CAS- ual Fridays projects made with new releases and oldies all together and some will have a full step by step tutorial.
So today I made a full tutorial for a kind of eclipse card.
Usually we need a larger alphabet single letters dies  to make a proper eclipse card,but as you can see CAS-ual Fri- dies words can make the job too.
So here is my eclipse card and yes, let's say Bravo to all of us who survive the Summer vacation... 
I know that with four small grand kids it makes my Summer a full time job of babysitting, but I still can craft in between.


So in general this card was made with several techniques  (see them all on the following step by step tutorial):
Stamping with VersaMark and heat embossing; masking with die cuts;coloring with water color markers;making faux chipboard with layered die cuts; adding texture with texture paste and stencil; misting around.
 And with all these techniques this card still looks pretty much clean and simple; exactly the way I wanted it to look.


 These are CAS- ual Friday products I used to make this card:

Pretty Posies 

Posies Fri Dies

 And now here is my step by step tutorial:

 1. Die cut or hand cut  your card front from a thick white cardstock. Stamp the largest flower with Memento Luxe black pigmented ink or us VersaMark (whatever works best for you). Heat emboss with clear embossing powder (if you used VersaMark  heat emboss with black embossing powder).


2. Stamp all flowers and leaves from Pretty Posies stamp set and die cut them all with Posies Fri- dies.
I made all masks in advance, also I didn't use them all at the end.


3. Use your die cuts as masks and stamp the flowers cluster on one corner. Then move to the other corner and make another flower cluster.


 This is how it looks after this serial masking, stamping and heat embossing.


4.Water color the stamped images with you favorite water color tools. Mine are Zig Real Brush.


5.  Arrange Bravo cutting die over the colored card front and die cut it.


Die cut the same word 2-3 times from black cardstock to make this your inner layers.
Glue the top die cut layer over the inner ones and make 3d " chipboard like" word.


6. Die cut deep purple background rectangle in the same size as your card front.
Glue the die cut card front over the background dark layer.
Glue the sentiment into the die cut negative part with 3d foam glue.


7. Use stencil and glitter paste over the " white spaces" to add some interest to the card.
 Let it dry.


8. Add few color splashes over the dry glitter paste.
You card is done! Enjoy!


Hope you liked my small tutorial and see in in a couple of weeks with more CAS- ual Fridays inspiration!
You can also get yourself great discount using my own special discount code.


Irit


Monday, 9 July 2018

Halloween book of black cats tutorial with SNS


Hello my dear crafty friends!
Irit from Irit Shalom Designs is here today  with my first July  Sparkle N' Sprinkle release project.


This Halloween card was made with the new and just released stamp set called When the black cats prowl
and it's incredible Halloween stamp set!
I made this card with Tattered Lace book shaped die as a Halloween book using Tonic Studios Mirror black and gold cardstock as my book layers.
The stamping was done with black pigmented ink and heat embossed with Black detail SNS embossing powder.
The coloring was made with Tonic Studios inks that are listed below.
More texture around the pages was added with Tonic Glimmer paste, Tonic Mica Mist and Tonic Nuvo drops.


Product list:


And now here is my step by step tutorial for you :
1.Die cut the book page layers from Mirror cardstock and die cut one upper layer from white cardstock.


2.Stamp the sentiment on the right side of the upper book page using Memento Luxe Black ink and heat emboss with black detail SNS embossing powder.


3.Stamp the pumpkin image on the left side in the same way.


 4. Cover the stamped images with Tonic Maskinh fluid and let them dry.


5. Cut the background white card and ink the edges with Tonic Carrot stick ink as shown.


6. Glue all layers with 1/2'' Tea- riffic SNS double sided tape.

7. Add texture with Tonic Glimmer black paste using Tando Creative mini stencil.
When dry peel off the masking fluid from the images.


 8. Stamp the pumpkin second time. Color with water color markers and Tonic inks and hand cut the colored image.Use Tonic water brush with inks for coloring.


9. Add gold  splashes over the stencil area with Tonic Midas Touch brush.


10. Add a few random gold crystal drops to finish the card.


 Thanks for being here today and see you in a couple of days with more SNS new release inspiration!

Saturday, 7 July 2018

CCB NOTEBOOK tutorial


Hello my dear crafty friends!
This altered notebook was made for Canvas Corp blog with their products and you can see a full step by step tutorial in the company blog HERE!


 Thanks for visiting my blog and wee you soon again!

Friday, 6 July 2018

Best day layout with BoBunny Sunshine Bliss collection


 Hello my dear crafty friends!
Irit is here today with a lovely and sunny baby girl layout made with a new and just released Sunshine Bliss collection.
This collection is so versatile. You can do baby girl pages or projects and you can also use it  for bright summer crafts and there are darker green cardstock designs in this collection that are great fit even for some Mixed Media projects.
I decided to make a baby girl layout just because the photos I used was a great fit for the colors.
This is my adorable grand daughter Netta who was here just 16 months old. She is a lovely and smartest  almost 5 years old now,but these photos are so great to scrap again and again.
So I made this layout with cut out photo as the background was out of the color range and made double matting for the cut out photo part with stamps.
The layout is pretty dimensional, but not Mixed Media kind.
Also I stamped over the background, but it was for more interest , not for making it messy.
Actually I really love classic scrapbooking and I am really sorry that it's out of the trend right now.
I made double title using this collection's Thickers and one single layered chipboard.
Some so called " journalling" was added with Combo stickers.


I used Vicki Boutin Mixed Media inks  to color the bare chipboards " as is"- just  grab ink over the pieces and let them dry as these inks are pigmented. You can also heat dry the inks or add some clear embossing powder over the ink.
The Noteworthy die cut flowers were embellished with green pearls and more  jewels were added over the layout.


 Here you can see all layers of this page, but it's still a flat scrapbooking page that can be kept in a clear pocket.


BoBunny product list:
Sunshine Bliss cardstock collection 12*12'': Tranquillity, Joy, Euphoria, Sunshine Bliss, Charm
Sunshine Bliss Combo Stickers
Sunshine Bliss Layered Chipboards
Sunshine Bliss Noteworthy die cuts
Sunshine Bliss Thickers
Fanciful Flourishes Stamp
Take Note Stamps
Wall to Wall Textures Stamp
Leaves Laser cut chipboards
Double Dot Citrus Jewels
Double Dot Emerald Jewels
Double Dot Citrus Flourish Jewels
Beautiful Dreamer Buttons
Color Weel Mixed Media inks Vicki Boutin by American Crafts

Thanks for being here with me today and I hope that you like my baby layout as much as I love it.
See you soon again!

Tuesday, 3 July 2018

CCB and Magenta altered canvas tutorial

Hello my dear friends!
This Mixed Media journal page was made for Canvas Corp Brands Playing with friends post and I used one of my other DT products on it. It was a year full of fun on Magenta blog and it's almost over, so let me show you this page and then you have a link to a full step by step tutorial in CCB blog HERE!


 I hope that you like this colorful summer page!

Friday, 29 June 2018

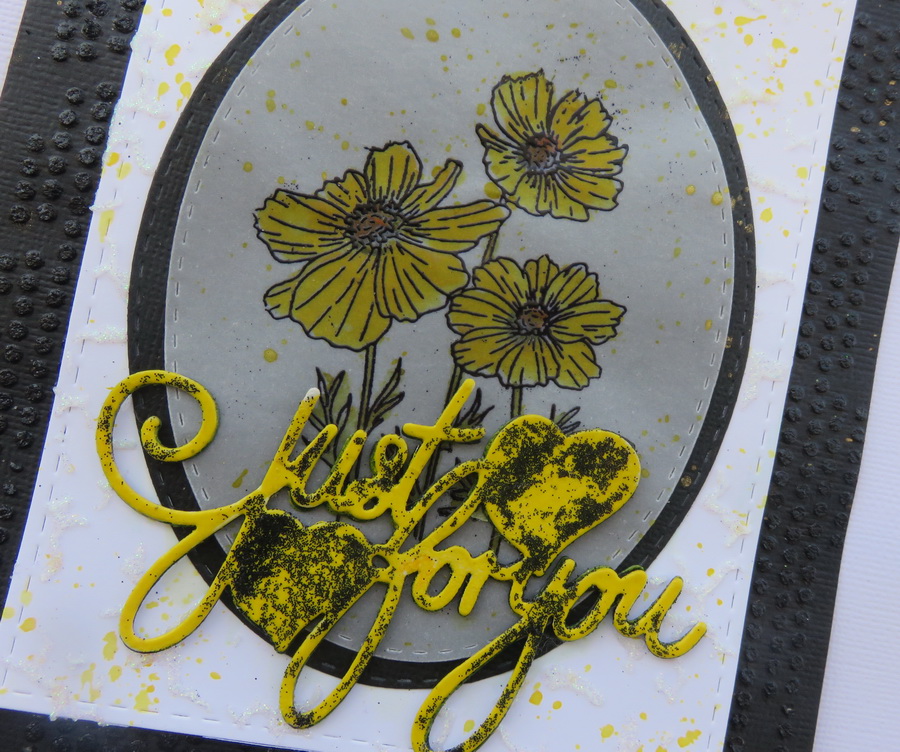
Just for you - SNS June reveal


 Hello my dear crafty friends and welcome to my last June Sparkle N' Sprinkle reveal post. Irit is here and
this time I used the same Cosmos Blooms set again, but in a totally different way.

Product list:
Stencils Art Anthology
 Zig Water colors

I stamped the flowers over vellum and color them with Zig water color markers.
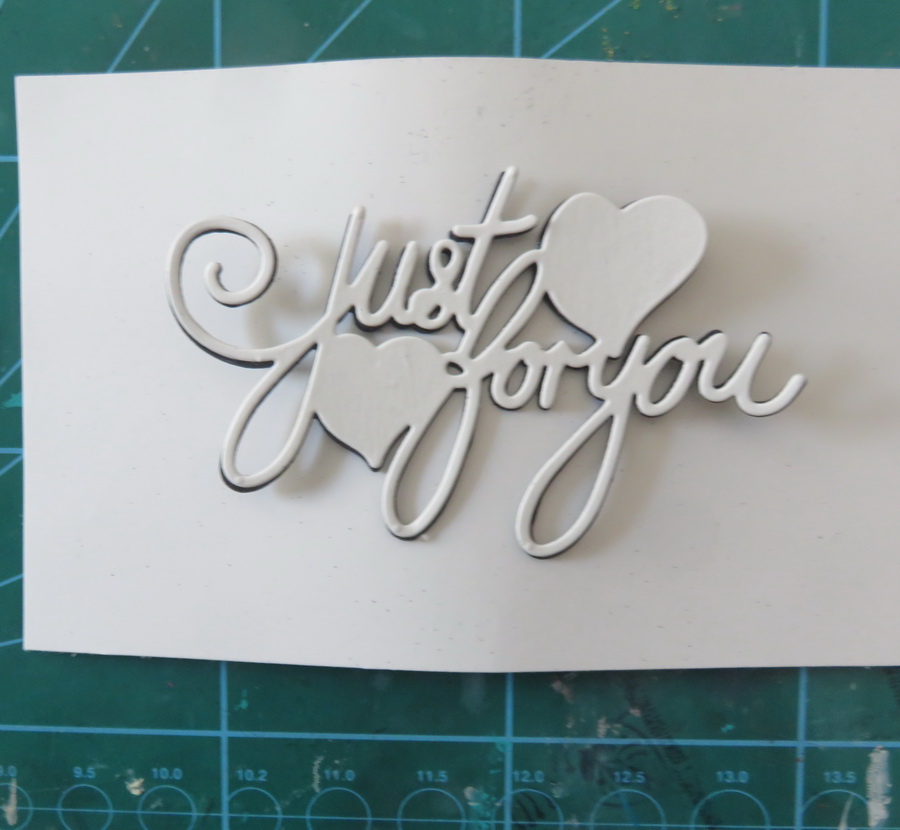
I made two layers of textured backgrounds using Tonic Studios Glitter pastes and make a chipboard like die cut Tonic sentiment.
You can see the whole process in my step by step tutorial HERE in my own blog!

Be sure to leave a comment both here on this SNS blog post and then head over to my own blog  and leave a comment there as well for your chance to win a $20 gift card to SNS! One lucky winner will be chosen from one of the Designers' posts on the last day of each month. A comment must be left on both the SNS Blog and the Designer's post in order to qualify. The winner will be announced on the 3rd of the following month, both on the SNS Blog and on the SNS Facebook page.


Step by step tutorial:
1. Die cut the oval frame and put the oval part as a mask over the rectangle die cut card front as shown. Cover it with stencil and add Tonic Moon stone glitter paste over the stencil. 
  

2. Die cut a smaller oval from vellum paper and stamp the blooms with VersaMark and heat emboss with black detail embossing powder.


3. Color the stamped blooms with Zig watercolor markers and arrange over the card as shown.


4. Make large black cardstock matting and cover the edges with the same stencil and Tonic Black Diamond glitter paste around. The blue die  cut piece is just a mask that keeps the white card space clean.


5. Die cut the sentiment several times and glue it one over another to make a chipboard like shape.White color should be on the top.All other colors are not so important as we don't see them.


.Cover the sentiment with VersaMark ink and heat emboss with Daffodil embossing powder


.Add SNS Brushable glue over the yellow sentiment and sprinkle a bit of Black Ice glitter


 Glue the sentiment over the card and mist a bit with yellow mist as shown.


Popular Posts