Tuesday 30 September 2014

Imaginarium GD post #3


Hello my dear crafty friends!
Irit Shalom is here again and this is my last post as Imaginarium September Guest Designer.

This time I worked with whatever chipboards left (lesson learned- try to keep more of products for the last post...). But then it was such a fun to make this last layout and I think it really tells a story of my dear 2 and something years old grandson Omer who already was 4 times abroad (even went to Thailand and Italy twice). Those are studio photos I used here, but they were so perfect  for those chipboard frames and a lot of travel stamping I added over the patterned paper.


I used 2 frames to frame 2 very similar photos  and even found the background paper that fits the photos brick background. Both frames were inked with blue distress ink. The criss cross frame was left inked only. The polaroid frame was also heate embossed with clear embossing powder and looks shiny.


 I made the title from two different boards: Favorite came from photo frame and Moment  came from Capture Moment Smile board. Both words and two flourishes were painted with Gelatos and I didn't try to make it pretty: you still can see a lot of paint left " as is". I think it makes it unique. But then as this is water color kind of a paint I added some fixative over the chipboards.

The upper hearts piece was painted in the same way as the title, but then I added some blue paint and mixed it to a different look.
And here are some stamped embellishments I made for this page .All stamps are from Rubber Dance, most of them from Travel set, some from Something wonderful set and some from Collage sets. All together they just made the great add- on to this page.


I hope I inspired you a bit with my kind of scrapping and crafting.
I want to thank the  Imaginarium company and the team for letting me  to work with most gorgeous chipboards and hope  to be back again some day.

Monday 29 September 2014

My handmade mini book with Meg's Garden new kit


Hello my dear crafty friends!
Irit is here and this is my first project made with new Meg's Garden most gorgeous new Sherlock mini book kit.
This is the first in Meg's Garden new product line of exciting mini book kits.
The papers are designed by Kerry- Jean Watson and it's available in download printable  version and in printed version I used here.
Each of us, DT members, made a totally different project with the very same products. Each of us had her own vision about the purpose of this kit and here is mine.
I made a handmade journal cover using a piece of up cycled corrugated cardboard, a piece of old trash found chipboard as a back cover and a lot of imagination...


The spine was made with a piece of a grunge board painted with copper acrylic paint. The corrugated front was torn here and there, painted with a mix of inks, acrylics and even some texture paste masking over.
I made the front title panel with Sherlock collection postcard and an envelope and added a heat embossed chipboard title.
The corners were embellished with inked white chipboard pieces. I made an embellishment cluster with  Meg's Garden vintage trinket piece that were in my embellishment bag. The golden lace trim was added over the spine and was a perfect match to the copper color of this piece.
I also added some misted into gold cherry blossom flowers.


As my final cover touch added a piece of pearl gold swirl and some more metal embellishments, such as a key, beads and a couple of chipboard arrows.


 And now for the inner album, made with brown paper bags as a tag album. I didn't add any photos or other goodies inside the pockets as this is pretty much an art piece, also it can be used as a real memory keeping album. All 5 paper bags were connected  with Bind- It- All tool (maybe my second time to use it, but I like it more than the binding rings).
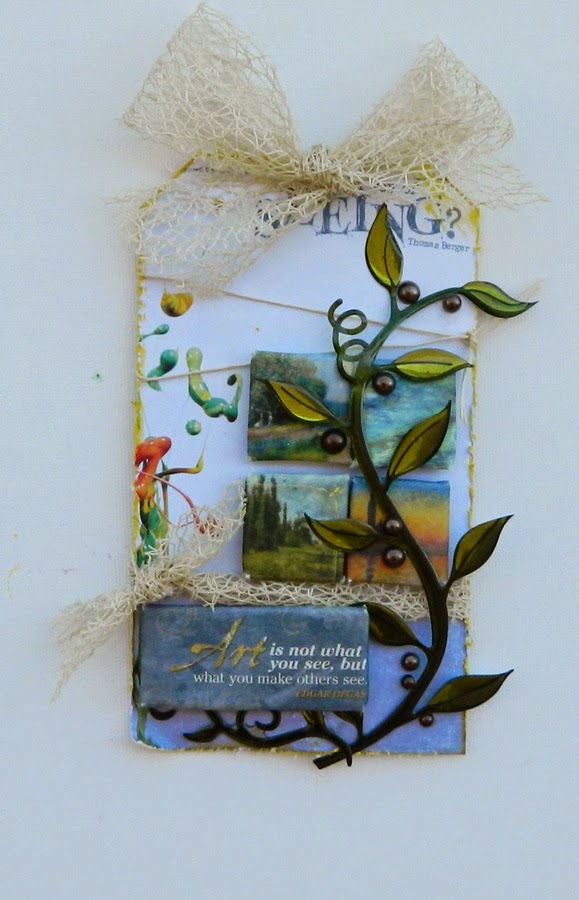
For the first page I made a collaged stamped scene made with a couple of stamps, a couple of masks, texture paste, mists and inks , some Tim Holtz tickets and a chipboard title.


 Each  page of this album was heavy stamped with a collection of my vintage stamps with mostly brown permanent ink and one single quote stamp was added to be the main  title of this page.


And another page here:


One more with another quote:


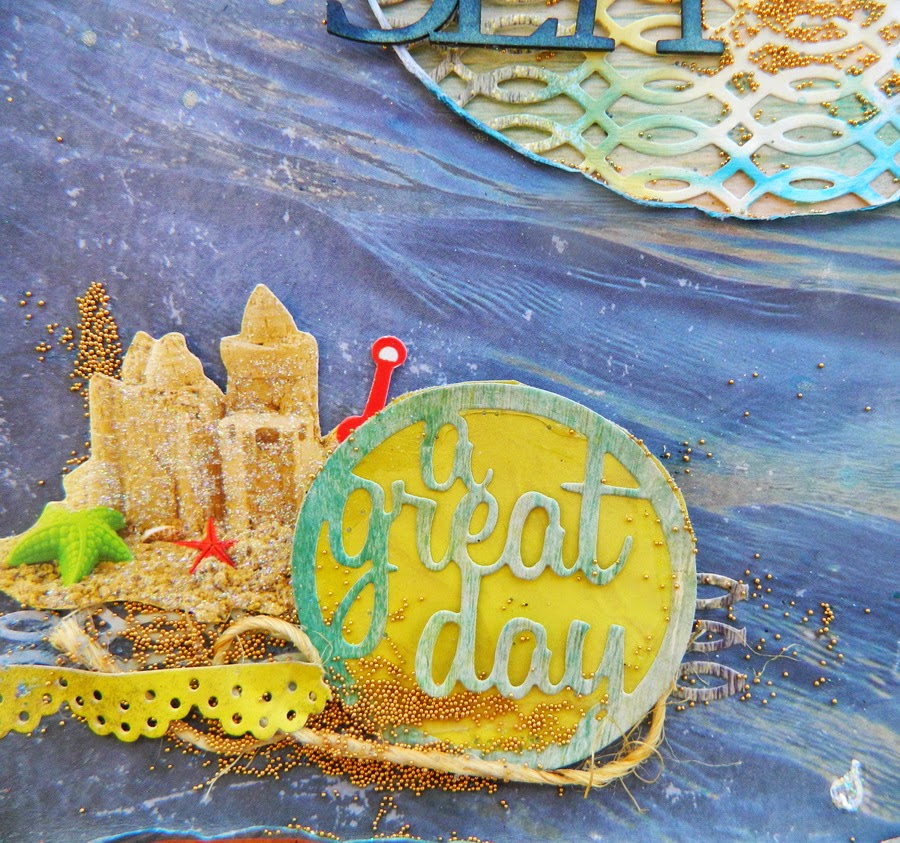
This is the only page that is full of color, but it was a mist if you read the quote:


 Some more pages here:


So as you can see each page has one outer pocket where I added some tags  inside and one big inside pocked as each page is a paper bag.
Make your own paper bag album with your own stamps you like and your own inspiration, but  use own new Sherlock kit and it will make your album unique!

Products used for this project
Meg's Garden products

Much more from the grab bag I got!
Other products:
Stamps: Rubber Dance
Inks, mists, gesso: Ranger
 Paints: Plaid, Faber Castell DMC
Bind it All tool and spiral
 Chipboards: Wycinanka
 Masks: Sweet Stamps, Memory box
Other: chipboard, corrugated cardsboard


Saturday 27 September 2014

My House of Everything

Hello my dear crafty friends!
Today I am going to share my Mixed Media 4 pieces art mini album made with 100 Proof Press gorgeous stamps and a lot of everything else... This project was print published in RubberStampMadness Fall 2014 issue on pages 40-41-42   with a full 3 pages article and even with my own photo, so now this is a time to post it on the web.
This is my Mixed Media House of everything piece.  Actually those are 4 same shape, but different sizes house shapes.Handmade chipboard cut and a lot of Mediums  over it.


I used 100 Proof Press stamps: Old Script over the roof; Calendar blocks as a background;  Intently Reading girl as a symbol of Knowledge and an Open  Notebook. For the Dream piece I used Boy Daydreaming  and Spring Bouquet . For the Adventure piece I used  Small many line Circle, A flock of crows and  Basic Compass and for the Imagination piece I used Butterfly boy, Old script, Spring Bouquet and  Basic Compass stamps.


Then I use Tando Creative and TCW stencils, Tsukineko  inks such as VersMark for embossing and also Memento, StazOn and even Brilliance, Sweet Stamps dimensional paints, yellow embossing powder, gesso and a bunch of mists.  And then I had to add something!
 It all was too flat, also messy and full of colors. So each piece got a piece or 2 of Wycinanka small chipboards  from 5 different sets. I decided to leave them just a bit black inked and bare, as is. Those are white chipboards that look like a wood, so it fits this Natural  feeling.


And as I can see, I am going to add some more of those Houses: maybe a House of Love, of Hope and of Inspiration. But not this time. You need to come back to check in the future as if it was good for big stamping print magazine, sure it's a good concept to continue with. And if you want to see me (not really, I  and not so pretty) in the magazine- this is still the last published issue  on the shelf. And I do have a new piece in Winter issue of RSM too! Not printed yet, but it comes.

Friday 26 September 2014

Art is not what you see tag

 My second project made for Paper House Productions Canvas stickers  week.
You can do it in no time with the tutorial I made here and a full supply list:

Supply list:
Tag products from PHP
Artist paper pad
Impressions canvas art stickers

Other products
Ink: Clearsnap
Mesh ribbon- May arts
Bling, plastic leaves: FWAB
 Other: twine

Step by step instructions for tag:
1. Make a tag from Artist paper; distress and ink the edges. Make a hole for the ribbon on the top.
2. Tie a piece of thin natural twine over the top third of the tag. Adhere 4 small canvas stickers making a square in the middle of your tag. Tie a piece of mesh under the stickers. Adhere rectangle sentiment sticker under the mesh.
3. Adhere a small piece of plastic leaves under the sentiment sticker and a big piece of leaves over the other 4 stickers. Add some pearls as shown and tie a bow on the top of your tag.


Thursday 25 September 2014

Down by the sea

My new layout, in my Light Mixed Media style again.
Paper House productions themed papers and some stickers, a lot of Die Versions die cuts , some wooden Creative Embellishments pieces, a lot of gel medium with micro beads that maybe look like a sand and maybe not, but this is my kind of a sand, title from ScrapFx, Some gelatos and a lot of endless blue see of Santorini.


I used Let's get sketchy sketch for this piece and a lot of inking, even over the photo that was not blue at all.


 And I enter this to some web challenges
Let's get sketchy sketch
Pixels and paper- Sea inspiration
 Off the rail scrapbooking- color inspiration
 Sassi scrappers - Moodboard

Wednesday 24 September 2014

PHP CANVAS STICKERS week: shadow box made in 20 minutes


 This is Paper House Productions Canvas stickers week and my first project made for this week.
Easy, artistic and fancy and done on a couple of minutes only.
Try it- here is a tutorial and my supply list

Shadow box products:
From PHP:
Blossom paper pad
Butterflies canvas art stickers
All thing beautiful 3d stickers
Butterflies puffy stickers

Other products:  Box- 7Gypsies
Bling, pearls, flowers: FWAB
  
Step by step instructions for the box
1. Use one piece of 6*6'' Blossom paper as your background paper and glue it on the back of a wooden insert.
2. Add all canvas stickers inside the holes of the insert as shown. Glue the corner sentiment 3d sticker on the lower right corner as shown.
3. Make a cluster of bling and flowers and glue them on the left top corner. Add some butterfly stickers over the upper cluster and over some of the small canvas stickers. Embellish some of the canvas butterflies with pink pearls.


Tuesday 23 September 2014

Sweet Stamps Favorite embellishments week


 Hello my dear crafty friends and welcome to Sweet Stamps favorite embellishments challenge!
As you know each one has her/his favorite way to embellish stamped cards. Mine is and was to use chipboards. And as Sweet Stamps is a house of Globecraft and Piccolo chipboards, I sure used them for my weekly project. I also used this very new, just released SS Stained Glass stencil and Globecraft and Piccolo delicious embossing enamels.
I made the background with white texture paste and 3 punched circles glued as my masks and then added 3 colors of metallic embossing powders. Heat made this very unique texture.
Then I heat embossed the new G/P flowers with 3 most gorgeous embossing enamels and added a few smaller chipboard flowers as the accents around the big ones.
The sentiment was stamped with permanent black ink and glued with 3d foam glue over the background.


And now it's your turn! Play with us! Show us your most favorite embellishment and you can win some gorgeous goodies!
 I enter this to SSSS stencils and stamps challenge


Cornish Heritage Farms sketch challenge


Hello my dear crafty friends and welcome to our new Cornish Heritage Farms  challenge!
This time we challenge you to use a sketch and this is a totally gorgeous one.
As you can see I rotated the sketch to make my card, but it's still a very same sketch.
I used  kraft cardstock only and made the stamped  Lined Paper  background; then I covered it with dry embossed layer and then added just a piece of golden doily. The part of a circle is with a stamped Trees  background and I added a mixed sentiment: partly stamped with Beautiful stamp set and partly made of stickers. A few random golden pearls were my only embellishment on this monochromatic card.

 And now I invite you to visit all our CHF designers for much more inspiration using this sketch.
Cornish Heritage Farms Blog - http://cornishheritagefarms.blogspot.com
Frances Byrne (Design Team Co-ordinator) - http://stampowl.blogspot.com
Kristine Reynolds - http://stampingandscrapingincalifornia.blogspot.com
Steph Ackerman - http://stephaniescraps.blogspot.com/ 
Amber Hillman - http://ambersantics.blogspot.com
Ann Marie Saunders - http://cre8nart.blogspot.com
Irit Shalom - http://iritshalom.blogspot.co.il
Kelly Santi - http://sandcastlestamper.blogspot.com
Maureen Russell - http://maureensmagic.blogspot.com
 I enter this to Red Rubber Inspirationals Stamp metal challenge


Monday 22 September 2014

Die Versions/Great Impressions blog hop


Welcome to the Die Versions + Great Impressions designers' blog hop! 


We've got both talented teams hopping today with a chance to win prizes from both of these craft suppliers!  Our theme for this hop is "Tis the Season" so get ready to see some beautiful holiday creations!  
You should have arrived here from  Katy's  blog.  If you haven't and would like to hop with us, please go back to the Die Versions blog to see the entire hop list and to start at the beginning for the maximum chances to win! 
  There will be two lucky winners – Die-Versions and Great Impressions are each giving away one $25 Gift Card!  The more you comment, the more chances you have of winning!

And here is my project for the hop.
 I made 3 gift bags and a gift tag using the same stamps and the very same most gorgeous Delicate Star Holiday die. I made cuts from light blue vellum and made the whole project in this winter blues and kraft cardstock. All stamping was heat embossed with a mix of blue powders.


And the bags only:


And now for a tag:


Thanks for stopping by today!  Your next stop in the hop is   Leah's blog! 
 We hope you're inspired all along the way, and that you grab all the goodies used from the Great Impressions and Die Versions stores!
 Those are the products I used for my project:
Die Versions die
 Delicate Star die
Great Impressions stamps:
Thanks to everyone!  Let's have a great hop!!!
Have fun with this hop!


Popular Posts