Friday, 20 December 2013

Featured Friday with PWP: Butterflies are Free


Hello my dear crafty friends and welcome to PWP Feature Friday. Irit is here again and as always I try to make a different project and this time it's a home made gift wrapping.

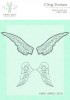
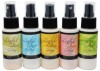
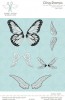
 I used a simple white wrapping paper paper, not even a cardstock and made my own stamped piece of patterned paper with PWP gorgeous butterfly stamps , mists and heat embossing.


Then I stamped, heat embossed and hand cut a couple of butterflies and added them over the box. Some chipboards and blings were also added over to get this fancy lovely gift box done.


And now it's your turn: get yourself some fantastic PWP products from the list below and make your own, one time only and unique  butterfly papers.
 I also enter this to some web challenges: 
Anything goes with embossing for Sparkle and Sprinkle
13 arts: Gift with  wrapping paper and 2 mediums(embossing powders, mists, inks, glitter paste)
 Anything but x- mas for Emergency crafters


Thursday, 19 December 2013

Hope and Inspire with WOW! EMBOSSING POWDERS AND THANKS CARD

Today I am going to share some great and fast stamping and embossing techniques and all you need are great huge background stamps , Staz- on inks and good embossing powder. That's it. Not more then 10 minutes to make an artsy card.
So here we go.
1. Stamp  a big stamp over cream cardstock with embossing ink. I used WOW!Embossing Powders Brocade and Flowers stamps on those cards.
Heat emboss it with regular clear glossy embossing powder and let it cool.
2. Make 3 circle sizes template over a leftover cardstock with 3 circle punches . You can also use dies or any other circle cutting system. Then put the template over your card and wipe Red, Blue and Yellow Staz-On inks inside the circle. Three primary colors will do all possible rainbow colors  you see.
Trim the cardstock and make your card layers.
3. The sentiment were both heat embossed with Black Ebony embossing powder, also one is a chipboard title and the second is made of foam letters. I made one embossed layer over foam letters (was afraid of the extra heat) and 3 layers over the chipboard.
Make some faux white pen stitches and  your card are finished.


Those 2 card were print published in August 2013 issue of UK Craft Stamper magazine and even made a cover side.

Wednesday, 18 December 2013

Dear Santa

Cute recycled (embossing folders) clear box with a chipboard Santa . All products in the box are from FabScraps. The over box bling is from FWAB and a flower is Prima.
Last minute kids gift!


Tuesday, 17 December 2013

Sweet Stamps challenge #148: Glitter

Hello dear crafty friends and welcome to our Sweet Stamps Glitter weekly challenge!

This is my glitter envelope gift card/money holder. I just used a kraft color  envelope, stamped the French writing stamp a couple of times with white ink and heat embossed it with a clear powder. Then I misted the whole envelope to get this vintage green color.


French Lattice frame die cut made with glitter red cardstock was glued over the double sided adhesive  sheet and I added white fine glitter over the glued spaces to get this gentle glitter background.
Then I die cut the most adorable SS die:Winter village and added some glaze and some stickles over the die cut piece that was glued to red glitter cardstock circle.
The whole piece was added over another SS die cut-Lace circle. Then a few smaller embellishments were added, some with glitter too and my shiny project was done.

Hope you like my envelope and will take a part in our Glitter challenge this week . Remember: you can win a lot of goodies, but you must enter your project to win! So go on! Enter and win!


Monday, 16 December 2013

Dance, love , sing: Finally making a selfie lo

My new " all about  me" page made with the new, just released , FabScraps new vintage paper line.Everything here is from this line: paper, chipboards, hand cuts, tags, stickers etc. I only added embellishments from other companies, such as FWAB pearls, flowers and blings;some lace, pins and 2 Die- Namites leave cuts. The background was made with colored molding paste and Tando stencil.


 I enter this page to some web challenges
Anything goes for Off the rail scrapbooking
3 facts and about me- for Challenge yourself

Sunday, 15 December 2013

Sweet Stamps monthly challenge:Easel card

Hello my dear crafty friends and welcome to Sweet Stamps Easel cards monthly challenge.
I am not a great shaped cards maker, but Easel card is an easy one and anyone can try it. So here is my closed card.
And that's how it looks when it is  opened.

As you can see it's just a very general vintage card made with dry background embossing, Artsy Fartsy Sweet Stamps Paris  Postcard stamp, some distress inking over the stamped image and one single SS fancy die cut .
And now it's your turn: make an easel card and you can win some gorgeous Sweet Stamps goodies too!

Saturday, 14 December 2013

Captured by love (and by birth): my dear twin girls

It was quite a while since I scrapped my dear girls together. So this is my joy and pride and my love and my everything: my twin girls having fun in between their college finals. (All over by now, but what a stress!)


I used AC Polka dot line of paper; A2Z scraplets amd Wycinanka chipboards; PWP stamps and clip image over the tag; a lot of embossing powders, Prima and other trims, FWAB blings; gold stickles and paint and some  really vintage golden buttons.


I also made my hand writing journaling over the die cuts on the top- read it if you want, it's short and lovely.
I enter this page to some web challenges:
 Family, words (love, joy) and corners  for Scrap our stash
 Sketch for C'est magnifique
Joy with journalling for Berry71Bleu


Popular Posts