


Hello my dear crafty friends and welcome to my new altered /home deco blog post.
This time I decided to make something really pretty, but useful. Let's think about the very first second after you are back home. First you put your handbag on the table. Check it- you sure do it. Then you begin to undress yourself from all your jewelry and you do it even before you change to slippers/flip- flops/whatever.
In the meantime you don't even remember where your fancy necklace, rings, watch or earrings are. Maybe on the half way to the bedroom. Maybe in between your bedroom and the bathroom. Maybe...
So to make my jewelry mess organised I made this lovely, fancy and even a bit of Modern Vintage style wooden tray organiser and I even made a small tutorial to show you how you can make it in almost no time (unless 24 hours of waiting for the ETI resin finish to be dry counts).
So here we go!
1. Paint the white wooden tray with teal/jade paint. This Tattered Angels DIY has a perfect coverage and you don't need any primer. This is just one single coat of the paint over the tray here.
Glue the cut out cardstock pieces inside the tray.

3. The next step is resin coverage of the entire tray inside. I decided not to use paper sealer and maybe it was a mistake as my cardstock colors were slightly changed under resin coverage. But I still like the final result. If you really want your cardstock to stay in the very same shade- use resin sealer over the paper before you add liquid resin over it.
So this was the stage that I don't take any photos of as I wanted to cover the bottom with a thin layer of resin, to add all golden trinkets and to cover them with the thick resin layer. The working time of resin is not too long and as I need to take the whole construction out to the balcony for good lighting, I decided that it's not really necessary to show you how to fill the tray with a thin resin layer.
I used 50 ml from each bottle of EasyCast Clear Casting Epoxy and mixed them together in the big mixing glass according to manufacturer's instructions. Then I added a very thin layer of mixed epoxy to each compartment and moved the whole tray to sides to get the equal coverage inside the compartments.
I used a heat gun to diminish the small bubbles and waited about 5-7 minutes as I wanted to add all trinkets over the first layer and it had to be a bit harder. A mix of golden buttons and trinkets was added- not so randomly- into each section and then I covered them with the rest of my mixed Clear Casting Epoxy. And just otn say: you don't need to use any sealer over metal pieces while working with ETI resins!

You can see the resin coverage from this particular photo angle. I also added 2 small bottles in one compartment on the top (you will see why later). I didn't need any glue, but just inserted them into resin layer.
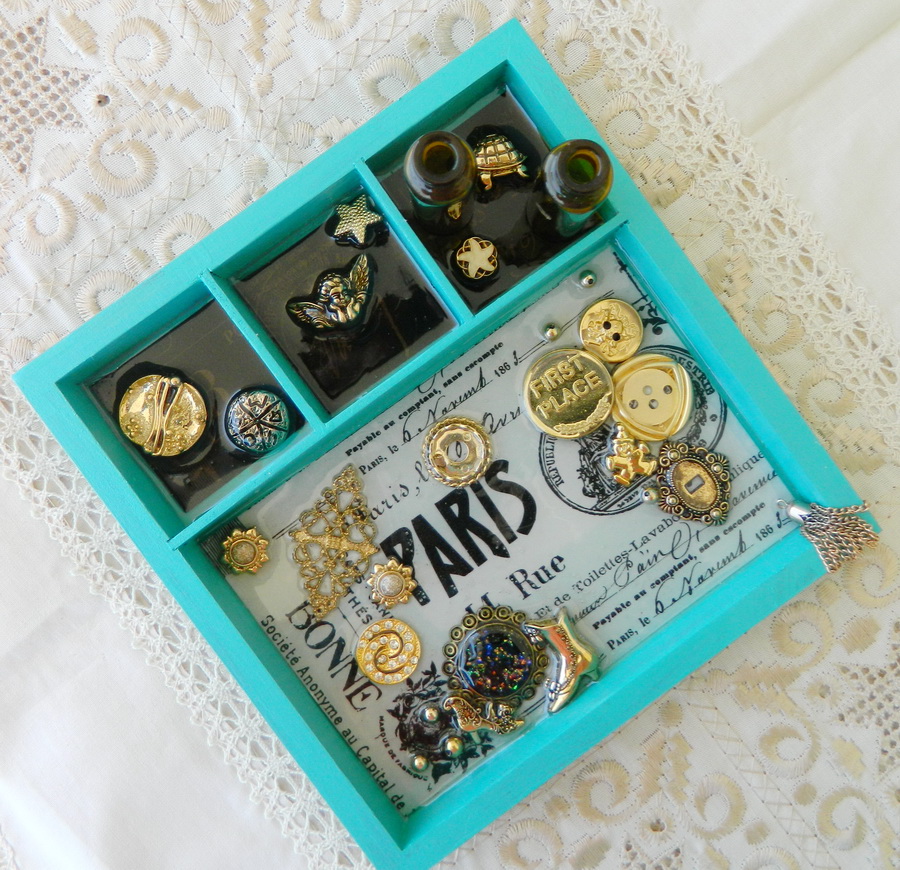
After 24 hours of waiting time this is my finished organiser and I am very glad with the result.

And now that's how it looks " in action"!

You also understand now why I added those two bottles: they are used to hang the earrings inside.
And by the way: each single piece of jewelry here is my own hand craft work!

I enter this to Faber Castell DMC alter something challenge


1 comment:
Fab alteration, Irit, lovely colour!
Post a Comment